
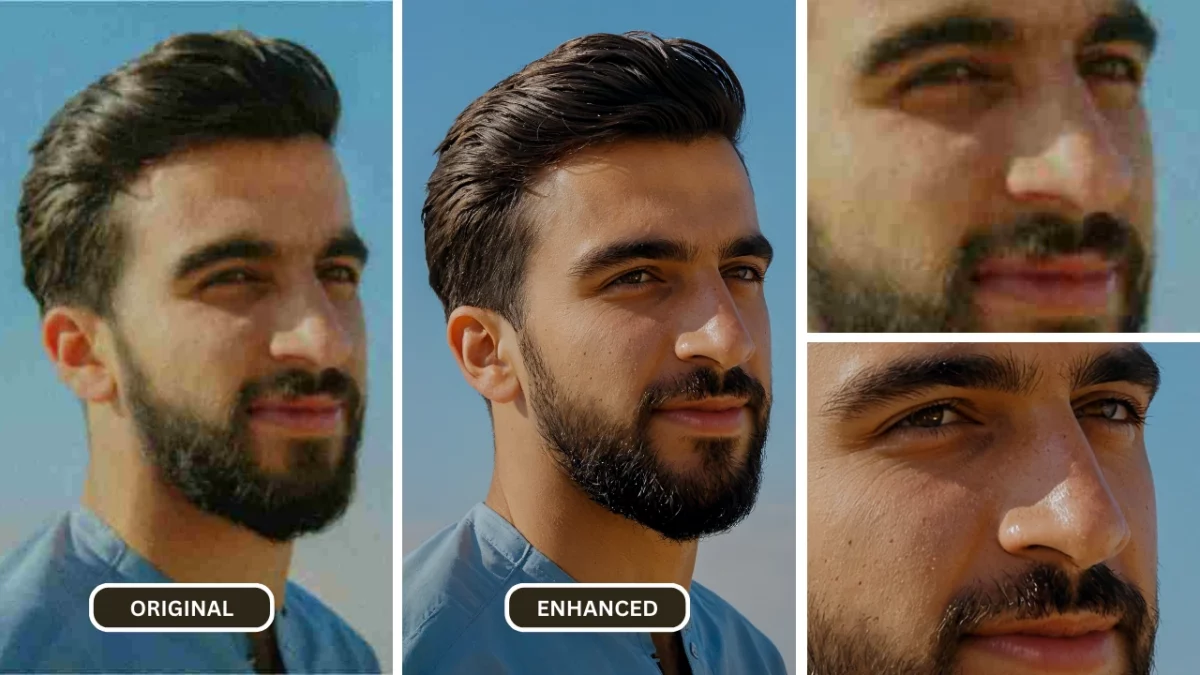
1. What Causes Image Pixelation?
Your photo looked fine on your phone. Then you printed it, posted it, or opened it on a larger screen and saw blocky squares. That is pixelation, one of the most common digital image problems.
In many cases you can make a pixelated photo look clearer, but the right method depends on whether the cause is enlargement, compression, or digital zoom. This guide compares four practical methods and explains their limits.
a. Common Reasons for Pixelated Images:
- Enlarging a small image: Software must create pixels that were not present in the source.
- Heavy compression: Repeated low-quality JPEG saves and messaging apps discard detail.
- Digital zoom: Zooming before taking a phone photo crops the sensor and enlarges the result.
Identifying the cause helps you choose a method that can improve the image instead of emphasizing the damage.
b. Understanding Image Resolution and Quality:
Image resolution refers to the number of pixels in an image. A higher resolution image contains more pixels, allowing for greater detail and sharper images. When an image is scaled up, the pixels are stretched to fill the larger space, and if the original resolution is too low, the image will appear pixelated.
c. Impact of Improper Scaling and Compression:
Scaling an image beyond its native resolution can lead to significant pixelation. This is because the image’s pixels are stretched to fit the larger size, making them appear larger and more visible. Similarly, excessive compression can remove important image data, resulting in a loss of detail and a pixelated appearance.
To avoid these issues, it’s essential to use appropriate image editing tools and techniques to resize and compress images without compromising quality. AI-powered image upscaling tools can be particularly effective in reducing pixelation and enhancing image detail to fix pixelated image easily.
2. Method 1: AI Upscaling (Fastest Workflow)
a. How AI Upscaling Handles Pixelation
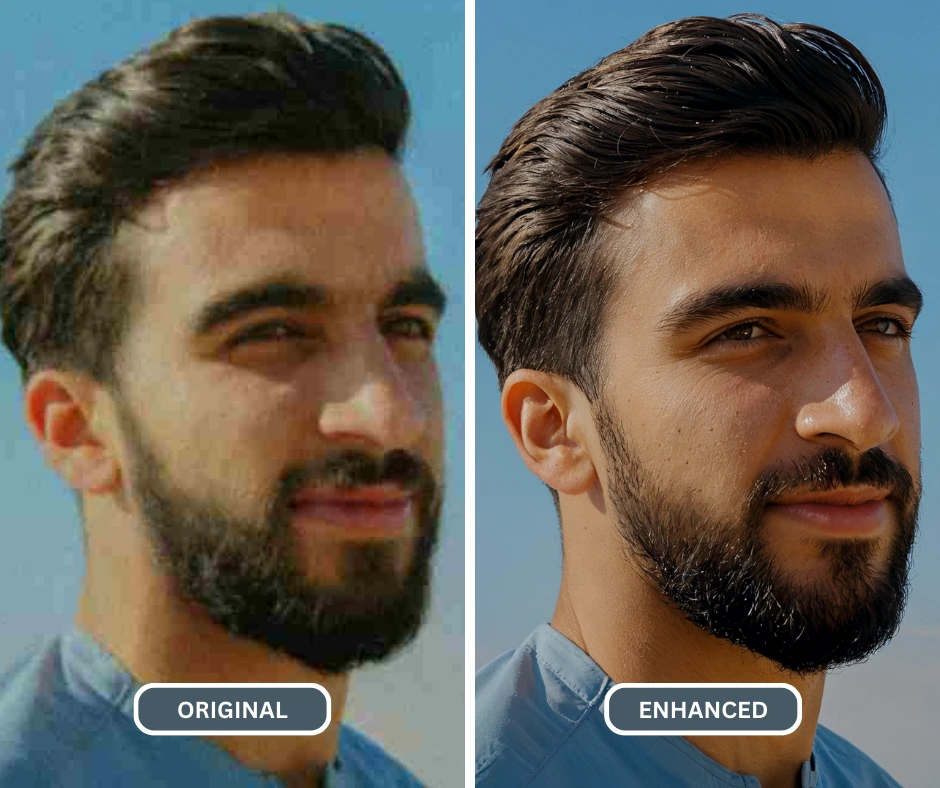
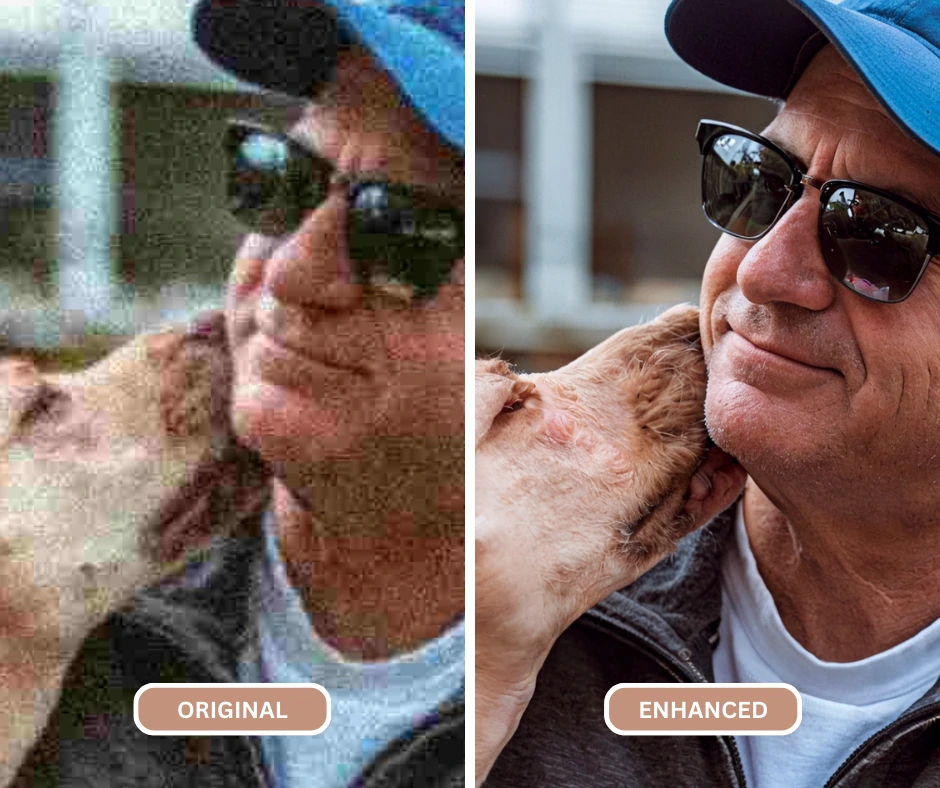
Traditional resizing estimates new pixels from nearby colors. PiktID Enhance uses an AI-assisted process to increase image dimensions and generate plausible detail based on the visible subject.
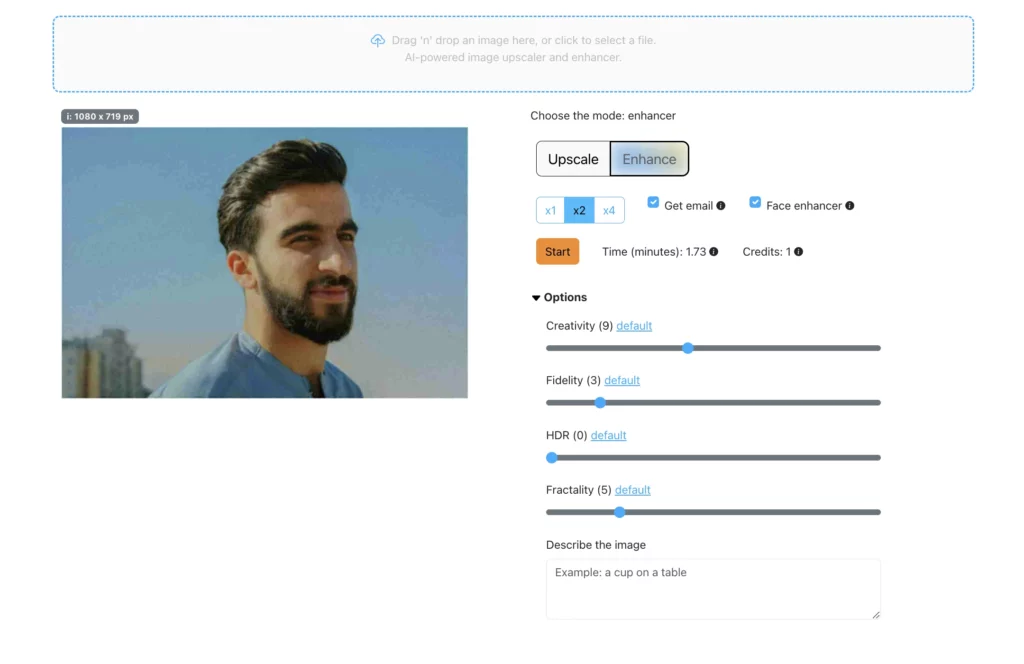
Open PiktID Enhance, upload the highest-quality source available, choose an upscale factor, process the image, and compare the preview with the original before downloading.
b. How AI Technology Improves Image Quality
Traditional image upscaling techniques often struggle to maintain image quality, leading to artifacts and a loss of detail. AI-powered tools like PiktID Enhance, however, utilize sophisticated algorithms to analyze the image’s structure and content. By understanding the underlying patterns and relationships between pixels, the AI can intelligently fill in missing information, resulting in a sharper, clearer, and more natural-looking image.
c. Where AI Upscaling Works and Where It Does Not
AI upscaling often works best on photos with a clear subject, usable edges, and moderate compression. Faces, hair, text, logos, and repeating textures require close inspection because generated detail can differ from the source.
It cannot recover the exact information that was removed from a file. Severe compression, extreme enlargement, motion blur, and tiny source images can still produce artifacts.
3. How to Fix a Pixelated Photo with PiktID Enhance
a. Preparing Your Image
Before you embark on the image restoration journey, it’s essential to prepare your image for optimal results. Here are some crucial considerations:
b. Supported File Formats:
- JPEG: The most common image format, suitable for a wide range of applications.
- PNG: Ideal for images with transparency or lossless compression.
- WebP: A modern image format that offers efficient compression and supports transparency.
c. Size Limitations:
Start with the original file whenever possible. A camera-roll or cloud-backup copy usually contains more useful detail than an image downloaded from a messaging app. Output size and processing availability depend on the current product limits shown in PiktID Studio.
d. Best Practices Before Uploading:
- Check for Corruption: Ensure your image is not corrupted or damaged.
- Backup Your Original Image: Always create a backup of the original image before applying any edits.
- Consider the Desired Output Size: Determine the final size you need for the upscaled image. This will help you choose the appropriate upscaling settings.
By following these guidelines, you can maximize the effectiveness of PiktID Enhance’s image restoration capabilities and achieve the best possible results.
e. Using PiktID Enhance's Enhancement Features
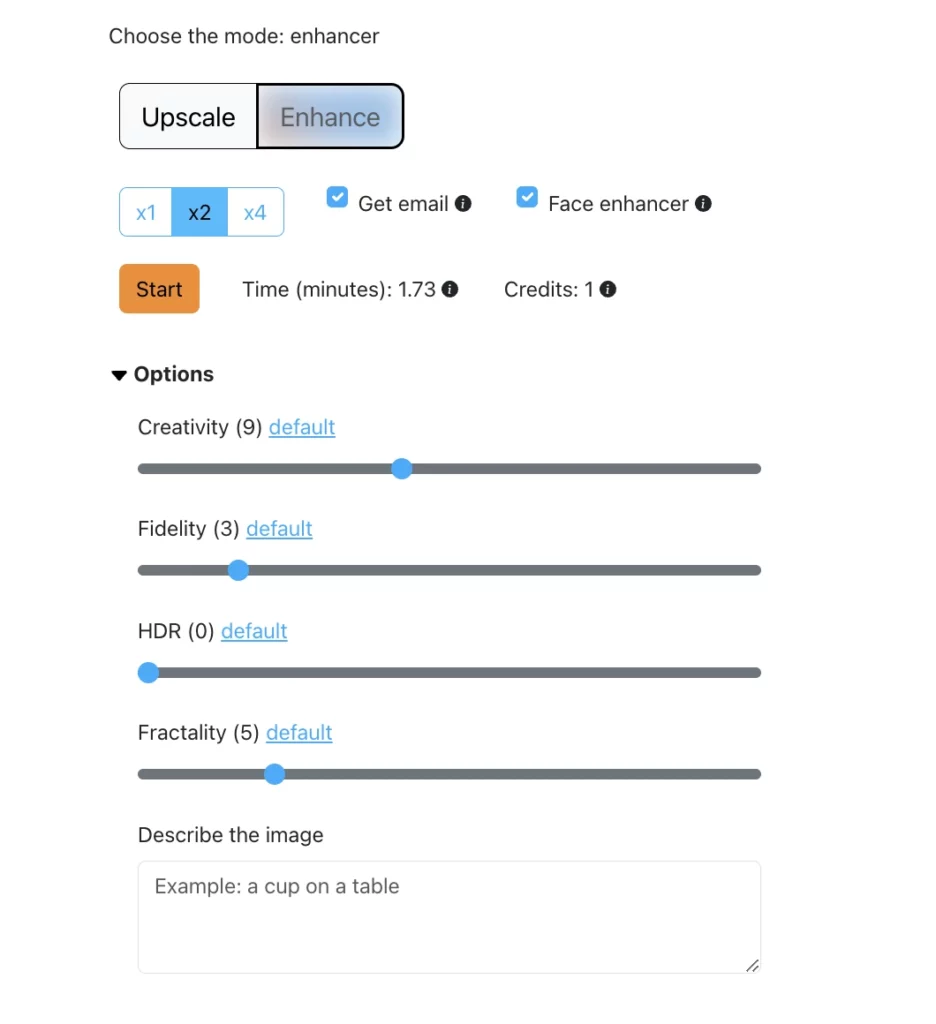
- Open PiktID Enhance in your browser.
- Upload a JPEG, PNG, or WebP image.
- Choose an available upscale factor that fits your intended screen or print size.
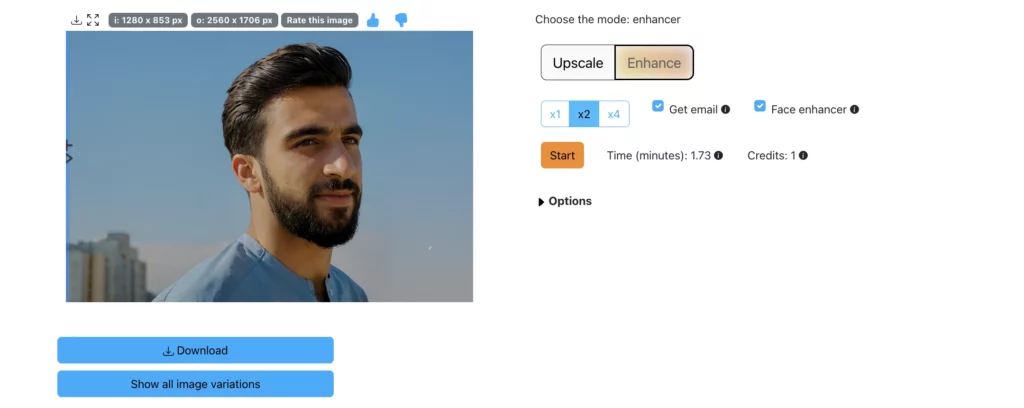
- Process the image, then inspect faces, text, edges, and textures at 100% zoom.
- Download the result only after comparing it with the original.
4. Best Practices for Optimal Results with AI Image Upscaling
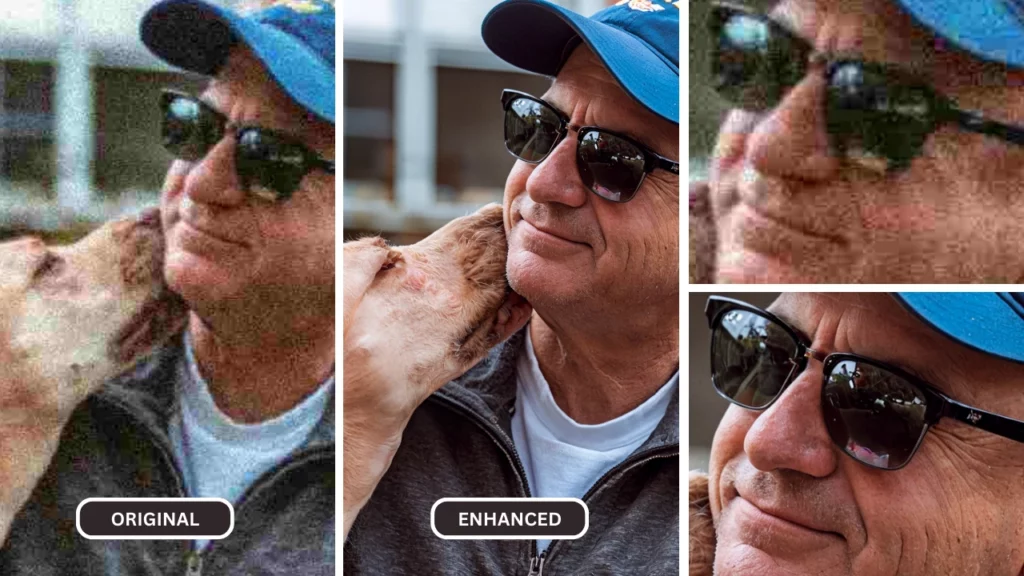
a. Image Selection:
While AI image upscaling tools like PiktID Enhance are incredibly powerful, it’s important to select suitable images for optimal results to fix pixelated image. Here are some tips to consider:
- Image Format:
- JPEG: A widely-used format that is well-suited for image upscaling.
- PNG: Ideal for images with transparency or sharp edges.
- Avoid heavily compressed or low-quality formats that may limit the potential for improvement.
- Image Resolution:
- While AI can enhance lower-resolution images, starting with a higher resolution image will yield better results.
- Aim for a minimum resolution of 720p for noticeable improvements.
- Lighting Conditions:
- Well-lit images with balanced lighting tend to upscale better.
- Avoid images with excessive shadows or highlights that may be difficult to enhance.
b. Common Mistakes to Avoid:
- Over-Processing:
- While AI tools can significantly improve image quality, excessive upscaling can lead to artifacts and a loss of detail.
- It’s important to strike a balance between enhancement and preserving the original image integrity.
- Neglecting Original Image Quality:
- While AI can work wonders, it’s crucial to start with a decent quality image. Severely damaged or heavily compressed images may not yield optimal results.
- Ignoring Color Balance:
- Pay attention to color balance and white balance before and after upscaling.
- Some tools might unintentionally alter the color palette, so it’s essential to review the results and make necessary adjustments.
c. Tips for Achieving the Best Results:
- Experiment with Different Settings:
- Many image upscaling tools offer adjustable settings, such as noise reduction, sharpness, and color enhancement. Experiment with different combinations to find the optimal settings for your specific image.
- Compare Before and After:
- Regularly compare the original and upscaled images to assess the improvements.
- This helps you fine-tune your settings and avoid over-processing.
- Use a Reliable Tool:
- Choose a reputable AI image upscaling tool like PiktID Enhance, which utilizes advanced algorithms to deliver high-quality results.
By following these best practices and leveraging the power of AI image upscaling tools, you can significantly fix pixelated image in a few clicks, whether you’re a professional photographer, a graphic designer, or simply an enthusiast.
5. Alternative Methods to Fix Pixelated Image
AI upscaling is not the only useful response to pixelation. Depending on the intended display size and the files available, reducing the displayed dimensions, using a desktop editor, or locating the original image may be the better choice.
a. Method 3: Photoshop and Desktop Editors
i. Photoshop Techniques
In Photoshop, open Image > Image Size, enable resampling, and test Preserve Details 2.0. Apply noise reduction cautiously and compare the result at 100% zoom. Sharpening alone does not restore missing information and can make pixel blocks more visible.
ii. Free Desktop Alternative: GIMP
In GIMP, open Image > Scale Image and test NoHalo or LoHalo interpolation. This provides manual control without a subscription, although results vary with the source and enlargement factor.
b. Methods 2 and 4: Reduce the Size or Find the Original
Reduce the display size: If an image looks pixelated at 1,200 pixels wide but acceptable at 600, publish it at the smaller size. Pixelation is partly relative to how large the file is displayed.
Find the original file: Check the camera roll, SD card, email attachment, or cloud backup before editing. This is the only method that can restore real source detail rather than estimating it.
6. Tips to Prevent Image Pixelation
a. Proper Image Capture Techniques
i. Camera Settings:
- Resolution: Use the highest resolution setting available on your camera to capture maximum detail.
- ISO: Keep the ISO setting as low as possible to reduce noise and grain.
- Aperture: Adjust the aperture to control depth of field and overall image sharpness.
- Shutter Speed: Use a fast shutter speed to minimize motion blur, especially when photographing moving subjects.
ii. Lighting Conditions:
- Optimal Lighting: Shoot in well-lit environments to avoid low-light noise and grain.
- Avoid Harsh Lighting: Direct sunlight can create harsh shadows and overexposure, so consider using diffusers or shooting in shaded areas.
- Utilize Natural Light: Natural light often produces more flattering and vibrant images.
iii. Resolution Guidelines:
- Web Images: Aim for a resolution of 72 DPI at a size of 1000-1500 pixels on the longest side.
- Print Images: Use a higher resolution of 300 DPI for optimal print quality.
b. Correct Storage and Sharing Methods
i. File Format Selection:
- Lossless Formats: Use lossless formats like PNG or TIFF for high-quality images that need to be edited or printed.
- Lossy Formats: For web images, use lossy formats like JPEG to reduce file size while maintaining acceptable quality.
ii. Compression Techniques:
- Choose the Right Compression Level: Balance compression level with image quality. Higher compression levels can reduce file size but may also lead to some loss of detail.
- Avoid Excessive Compression: Excessive compression can significantly degrade image quality, resulting in pixelation and other artifacts.
iii. Backup Recommendations:
- Regular Backups: Regularly back up your images to an external hard drive or cloud storage to protect against data loss.
- Multiple Copies: Store multiple copies of your important images in different locations to minimize the risk of data loss.
- Cloud Storage: Utilize cloud storage services to easily access and share your images from any device.
By following these tips, you can capture and store high-quality images that are less prone to pixelation and other image degradation issues.
7. Frequently Asked Questions (FAQs)
i. Can a Pixelated Photo Be Fully Restored?
Not exactly. When original detail has been discarded, an AI upscaler predicts plausible replacement detail rather than recovering the lost pixels. The result may look clearer, but it remains a reconstruction.
ii. Is There a Free Way to Fix Pixelated Photos?
PiktID Studio may provide introductory credits; check the current interface for applicable terms. GIMP is a free desktop editor, and reducing the display size or locating the original file costs nothing.
iii. Why Do Photos Become Pixelated on Messaging Apps?
Messaging apps often compress photos to reduce transfer size. When available, send the image as a document or file to preserve more of the original data.
iv. What Resolution Is Useful for Printing?
A common print target is about 300 pixels per inch at the final print size. A 4 by 6 inch print therefore needs roughly 1,200 by 1,800 pixels. Printer, viewing distance, and source quality also affect the result.
v. Can it fix text in pixelated images?
While PiktID Enhance excels at improving overall image quality, it may not be able to perfectly restore text in severely pixelated images. In some cases, the AI can partially recover text, but for optimal results, it’s recommended to use dedicated text restoration tools or consult with a professional image restoration specialist.
However, for images with moderate pixelation, PiktID Enhance can often significantly improve the readability of text.
8. Fix Pixelated Photos Without Hiding the Limits
a. When to Use PiktID Enhance
Use the highest-quality original you can find, choose the smallest output that meets the real need, and compare every processed result with the source. AI upscaling is useful for plausible visual improvement, while the original file remains the best source of authentic detail.
b. Final Tips for Success
To get the best results from PiktID Enhance, consider the following tips:
- Image Quality Matters: Start with the highest quality source image possible. The better the original image, the better the upscaled result.
- Experiment with Different Settings: PiktID Enhance offers various settings to fine-tune the upscaling process. Experiment with different options to achieve the desired level of detail and clarity.
- Consider the Original Image: The effectiveness of image upscaling depends on the original image quality. Heavily compressed or pixelated images may not yield optimal results.
- Use PiktID Enhance Responsibly: While PiktID Enhance can significantly improve image quality, it’s important to use it responsibly. Avoid over-upscaling images, as this can lead to artifacts and loss of detail.
c. Try PiktID Enhance on Your Image
Open PiktID Enhance, upload the best source file available, and inspect the preview before downloading or publishing it.