
AI product photography for Shopify has transformed how merchants convert browsers into buyers — stores using on-model images see up to 40% higher conversion rates than those using flat-lay or mannequin photography alone. Yet the cost and complexity of traditional photoshoots prevent most small and mid-size Shopify stores from upgrading their product imagery.
AI model generation changes this equation. With a platform like On-Model, you can transform existing flat-lay or mannequin photos into professional on-model images — without booking a photographer, model, or studio.
This guide walks you through three approaches for integrating AI photography into your Shopify workflow, from simple manual upload to full API automation.
Shopify Image Requirements
Before generating images, understand what Shopify needs:
| Requirement | Specification |
|---|---|
| Recommended size | 2048 × 2048 pixels (square) |
| Maximum size | 4472 × 4472 pixels |
| Maximum file size | 20 MB |
| Supported formats | JPEG, PNG, WebP, GIF, HEIC |
| Aspect ratio | Square (1:1) recommended for product pages |
| Minimum | 800 × 800 pixels for zoom functionality |
Approach 1: Manual Workflow
Best for: Stores with fewer than 50 products per month, or those testing AI photography before committing to automation.
Step-by-Step
1. Prepare your flat-lay images
Photograph your products on a clean, flat surface with even lighting. Each garment should be photographed separately (top, bottom, shoes). The better your input, the better the AI output.
2. Log into On-Model
Go to on-model.com and sign up or log in. The free tier gives you 50 credits per month — enough for 50 product images.
3. Upload your garment images
Use the Flat-to-Model feature. Upload one to three garment images per look (e.g., shirt + pants + shoes). The platform combines them into a single outfit on the model.
4. Select your AI identity
Choose from 40+ pre-built identities or create a custom identity for brand consistency. For Shopify stores, maintaining the same identity across your catalog creates a cohesive shopping experience.
5. Configure and generate
Select your pose, background, and output size. For Shopify product pages:
- Pose: Front-facing, natural stance (standard PDP)
- Background: Clean white (#FFFFFF) for main product image
- Size: 2K
- Aspect ratio: 3:4 or 1:1
6. Download and upload to Shopify
Download the generated image, then upload it to your Shopify product via Products → [Product Name] → Media → Add media.
Time Estimate
| Step | Time per Product |
|---|---|
| Prepare flat-lay photo | 2–5 minutes |
| Upload to On-Model | 30 seconds |
| Configure and generate | 1–2 minutes |
| Download and upload to Shopify | 1 minute |
| Total | 5–9 minutes per product |
Compare this to traditional photography: booking, travel, shoot day, retouching, and delivery takes 2–4 weeks and $50–$150 per look.
Approach 2: API Integration
Best for: Stores with 50–500 products per month, or development teams building automated product pipelines.
Overview
On-Model’s REST API lets you programmatically generate images within your existing product management workflow. A typical integration:
- New product is created in Shopify (or your PIM)
- Your backend uploads the flat-lay images to On-Model’s API
- On-Model processes the job asynchronously
- A webhook notifies your backend when images are ready
- Your backend downloads the images and pushes them to Shopify via the Shopify Admin API
Shopify Admin API: Uploading Product Images
After generating images via On-Model, push them to Shopify:
import requests

SHOPIFY_STORE = "your-store.myshopify.com"
SHOPIFY_TOKEN = "shpat_your_admin_api_token"
PRODUCT_ID = "1234567890"

def upload_to_shopify(image_url: str, product_id: str, alt_text: str):
    """Upload an image to a Shopify product."""
    response = requests.post(
        f"https://{SHOPIFY_STORE}/admin/api/2024-10/products/{product_id}/images.json",
        headers={
            "X-Shopify-Access-Token": SHOPIFY_TOKEN,
            "Content-Type": "application/json"
        },
        json={
            "image": {
                "src": image_url,  # URL of your generated image
                "alt": alt_text
            }
        }
    )
    response.raise_for_status()
    return response.json()
Architecture Diagram
┌─────────────┐     ┌──────────────┐     ┌─────────────┐
│   Shopify    │────▶│  Your Server │────▶│  On-Model   │
│   Product    │     │  (webhook    │     │  API        │
│   Created    │     │   handler)   │     │             │
└─────────────┘     └──────┬───────┘     └──────┬──────┘
                           │                     │
                           │    Job completed     │
                           │◀────────────────────┘
                           │
                    ┌──────▼───────┐
                    │  Download    │
                    │  + Push to   │
                    │  Shopify API │
                    └──────────────┘
Approach 3: Bulk Catalog Migration
Best for: Stores migrating their entire existing catalog to AI-generated on-model imagery, or seasonal catalog refreshes.
Bulk Processing Steps
1. Export your catalog
Export your Shopify product catalog as CSV: Products → Export → All products.
2. Map products to images
Create a mapping file that pairs each product SKU with its flat-lay input images and desired generation parameters.
3. Batch process via API
Use On-Model’s batch processing to generate all images:
import csv

def process_catalog(csv_path: str, identity_code: str):
    """Process an entire Shopify catalog export."""

    products = []
    with open(csv_path) as f:
        reader = csv.DictReader(f)
        for row in reader:
            if row.get("Image Src"):
                products.append({
                    "sku": row["Variant SKU"],
                    "handle": row["Handle"],
                    "images": [row["Image Src"]],
                    "identity": identity_code
                })

    print(f"Processing {len(products)} products...")

    # Process in batches (respect rate limits)
    for i in range(0, len(products), 10):
        batch = products[i:i + 10]
        # ... upload, generate, download for each product
        # See batch processing code in our API tutorial
4. Upload generated images back to Shopify
Use the Shopify Admin API to push generated images to each product. You can position AI-generated images as the primary image or add them alongside existing photos.

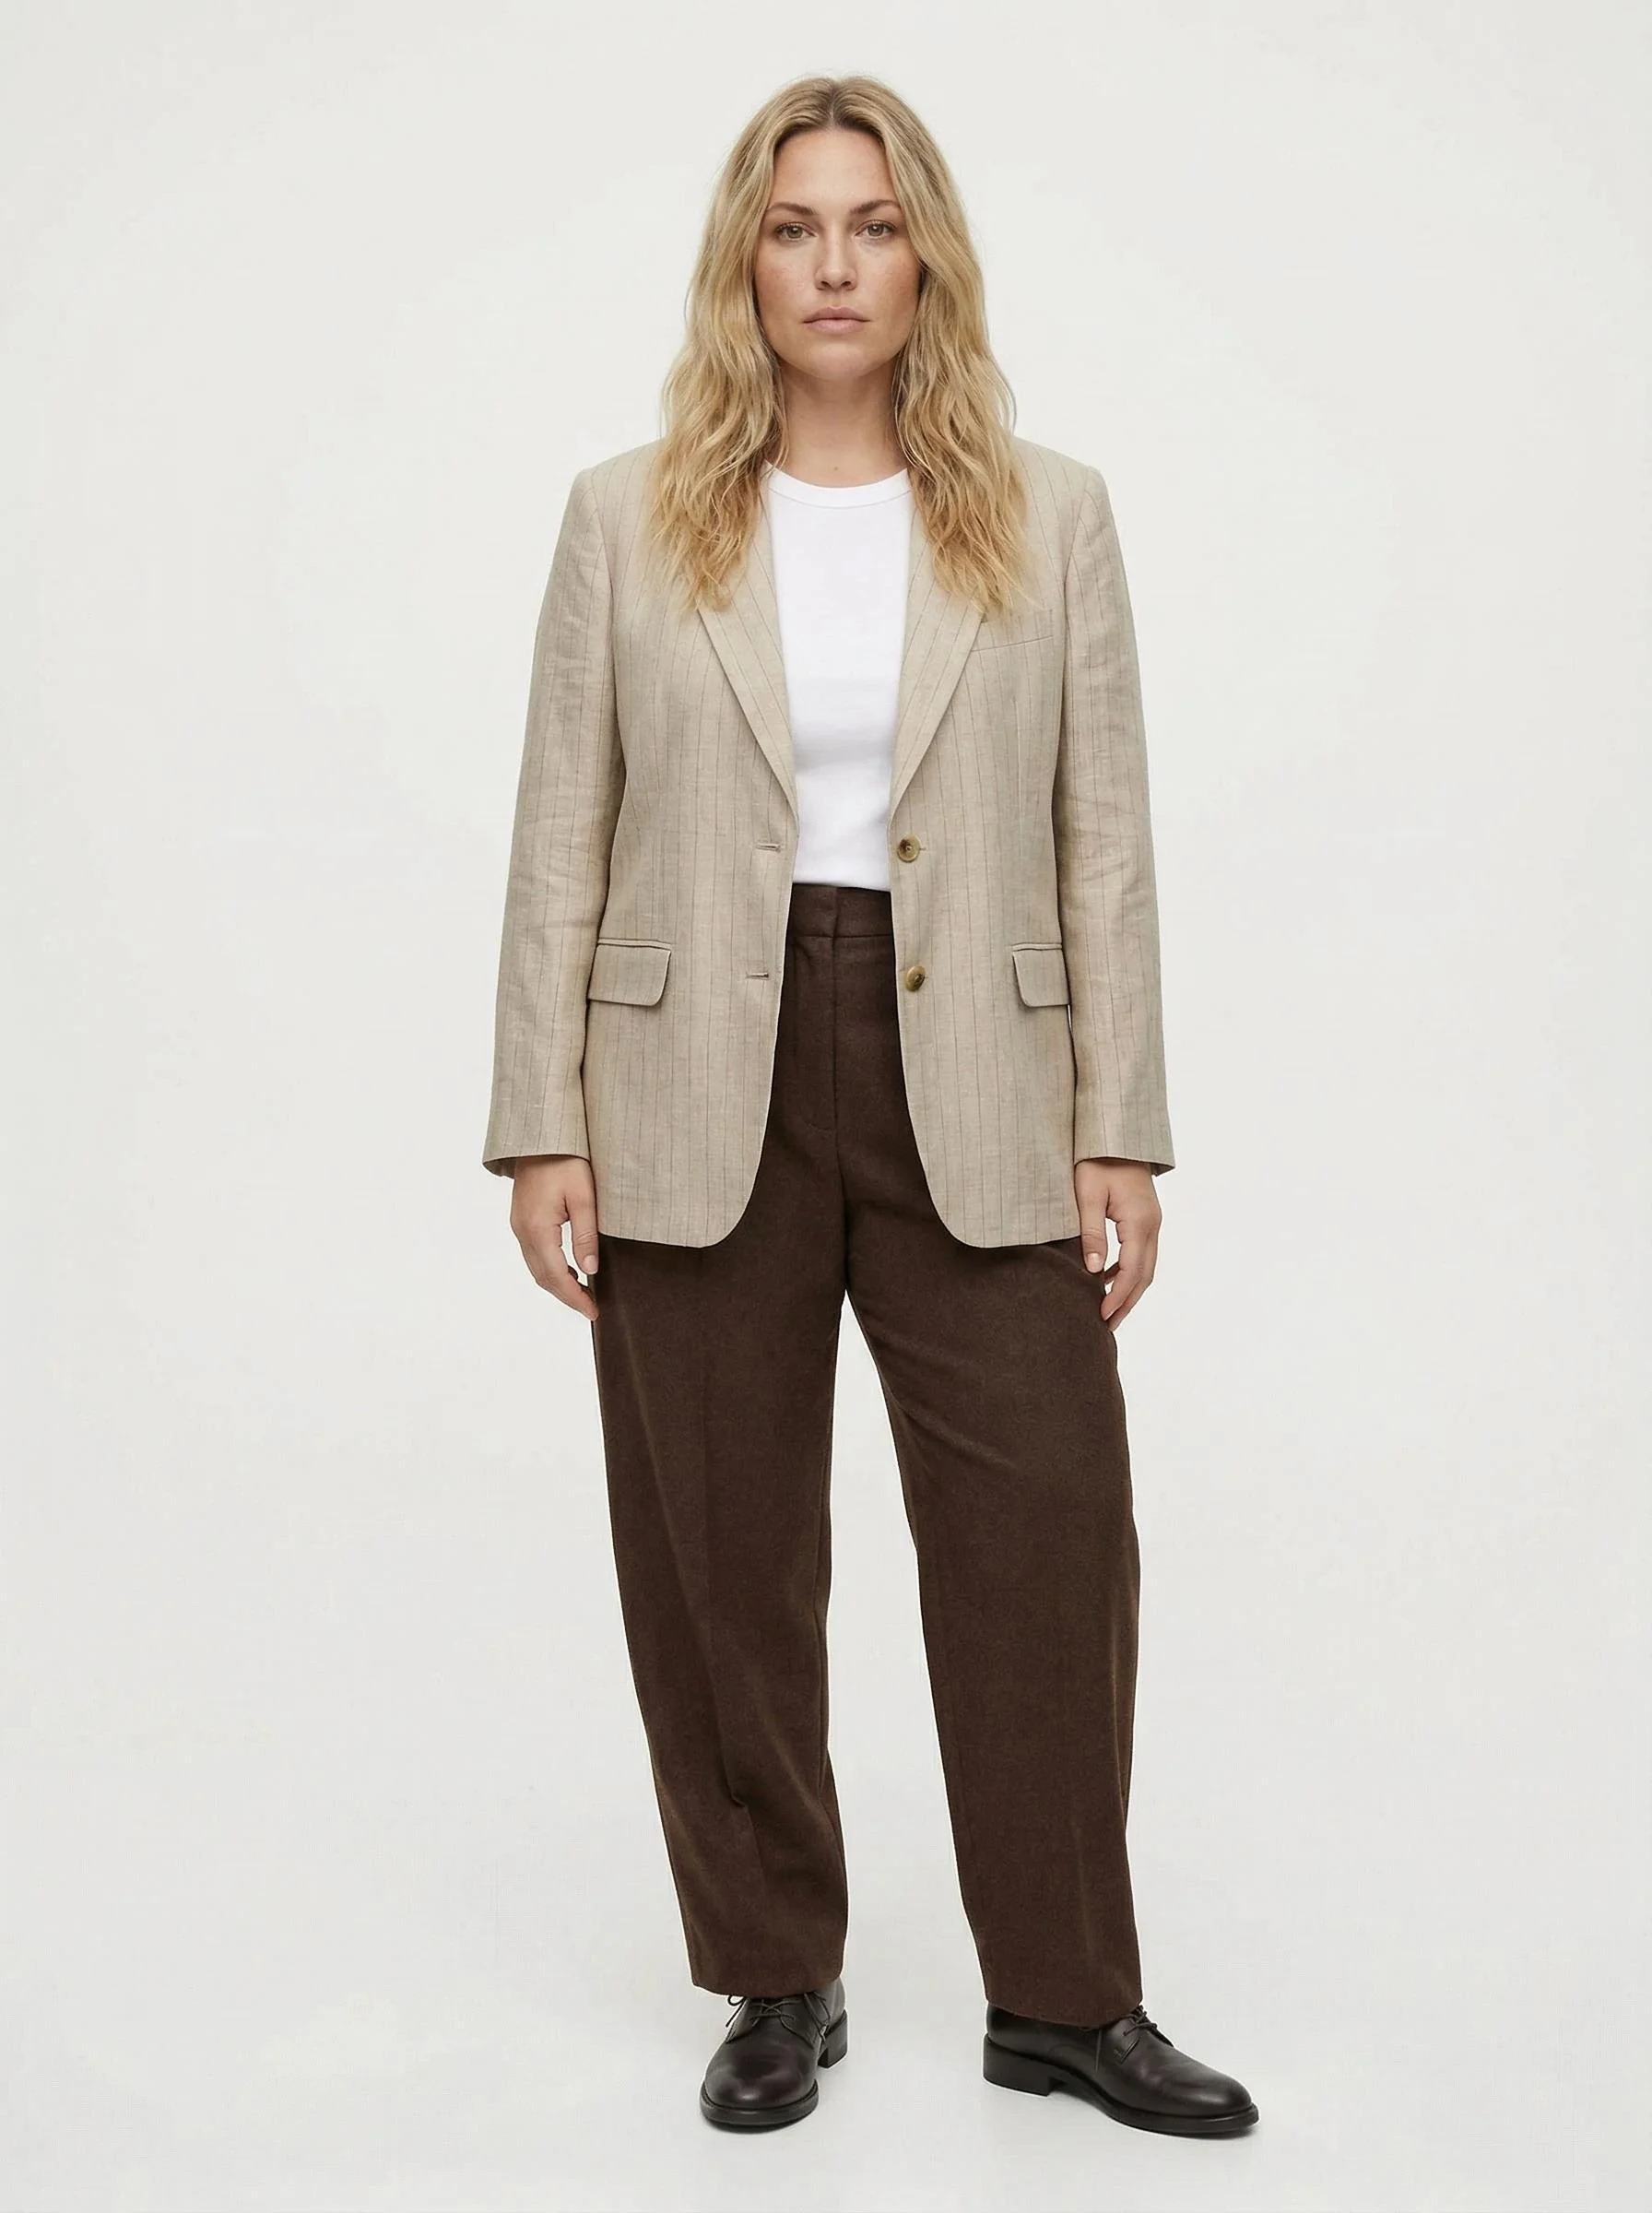
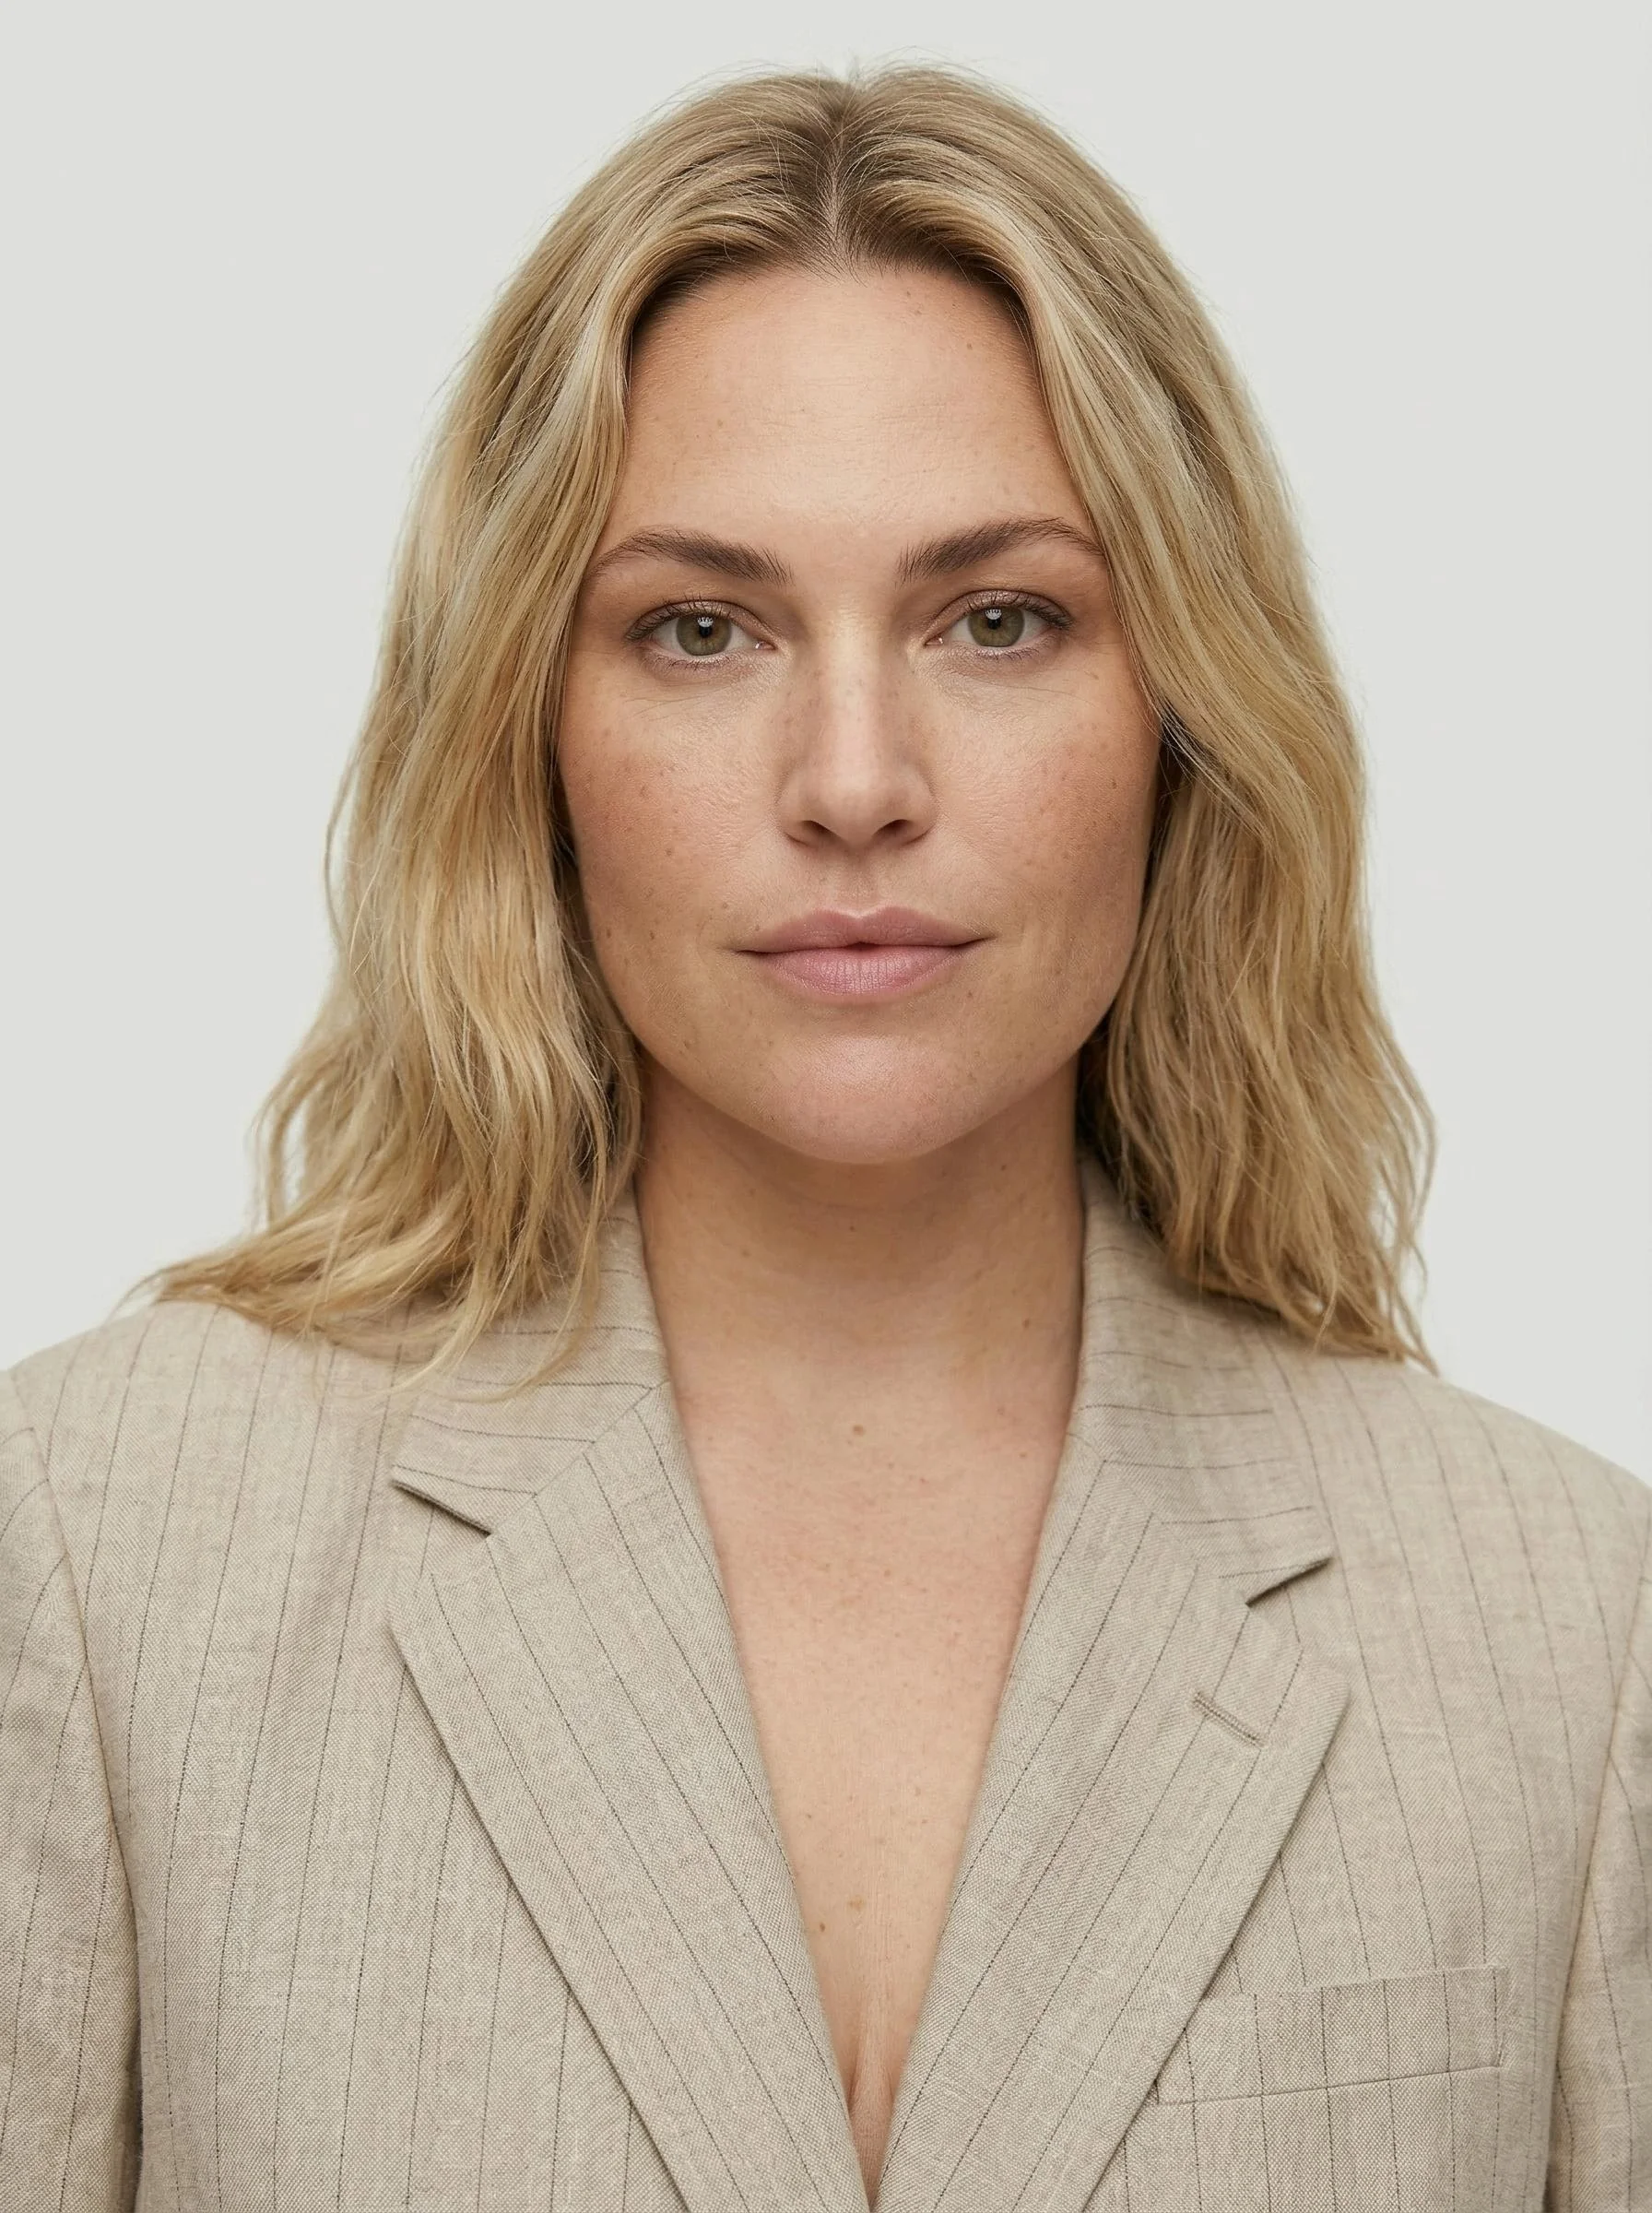
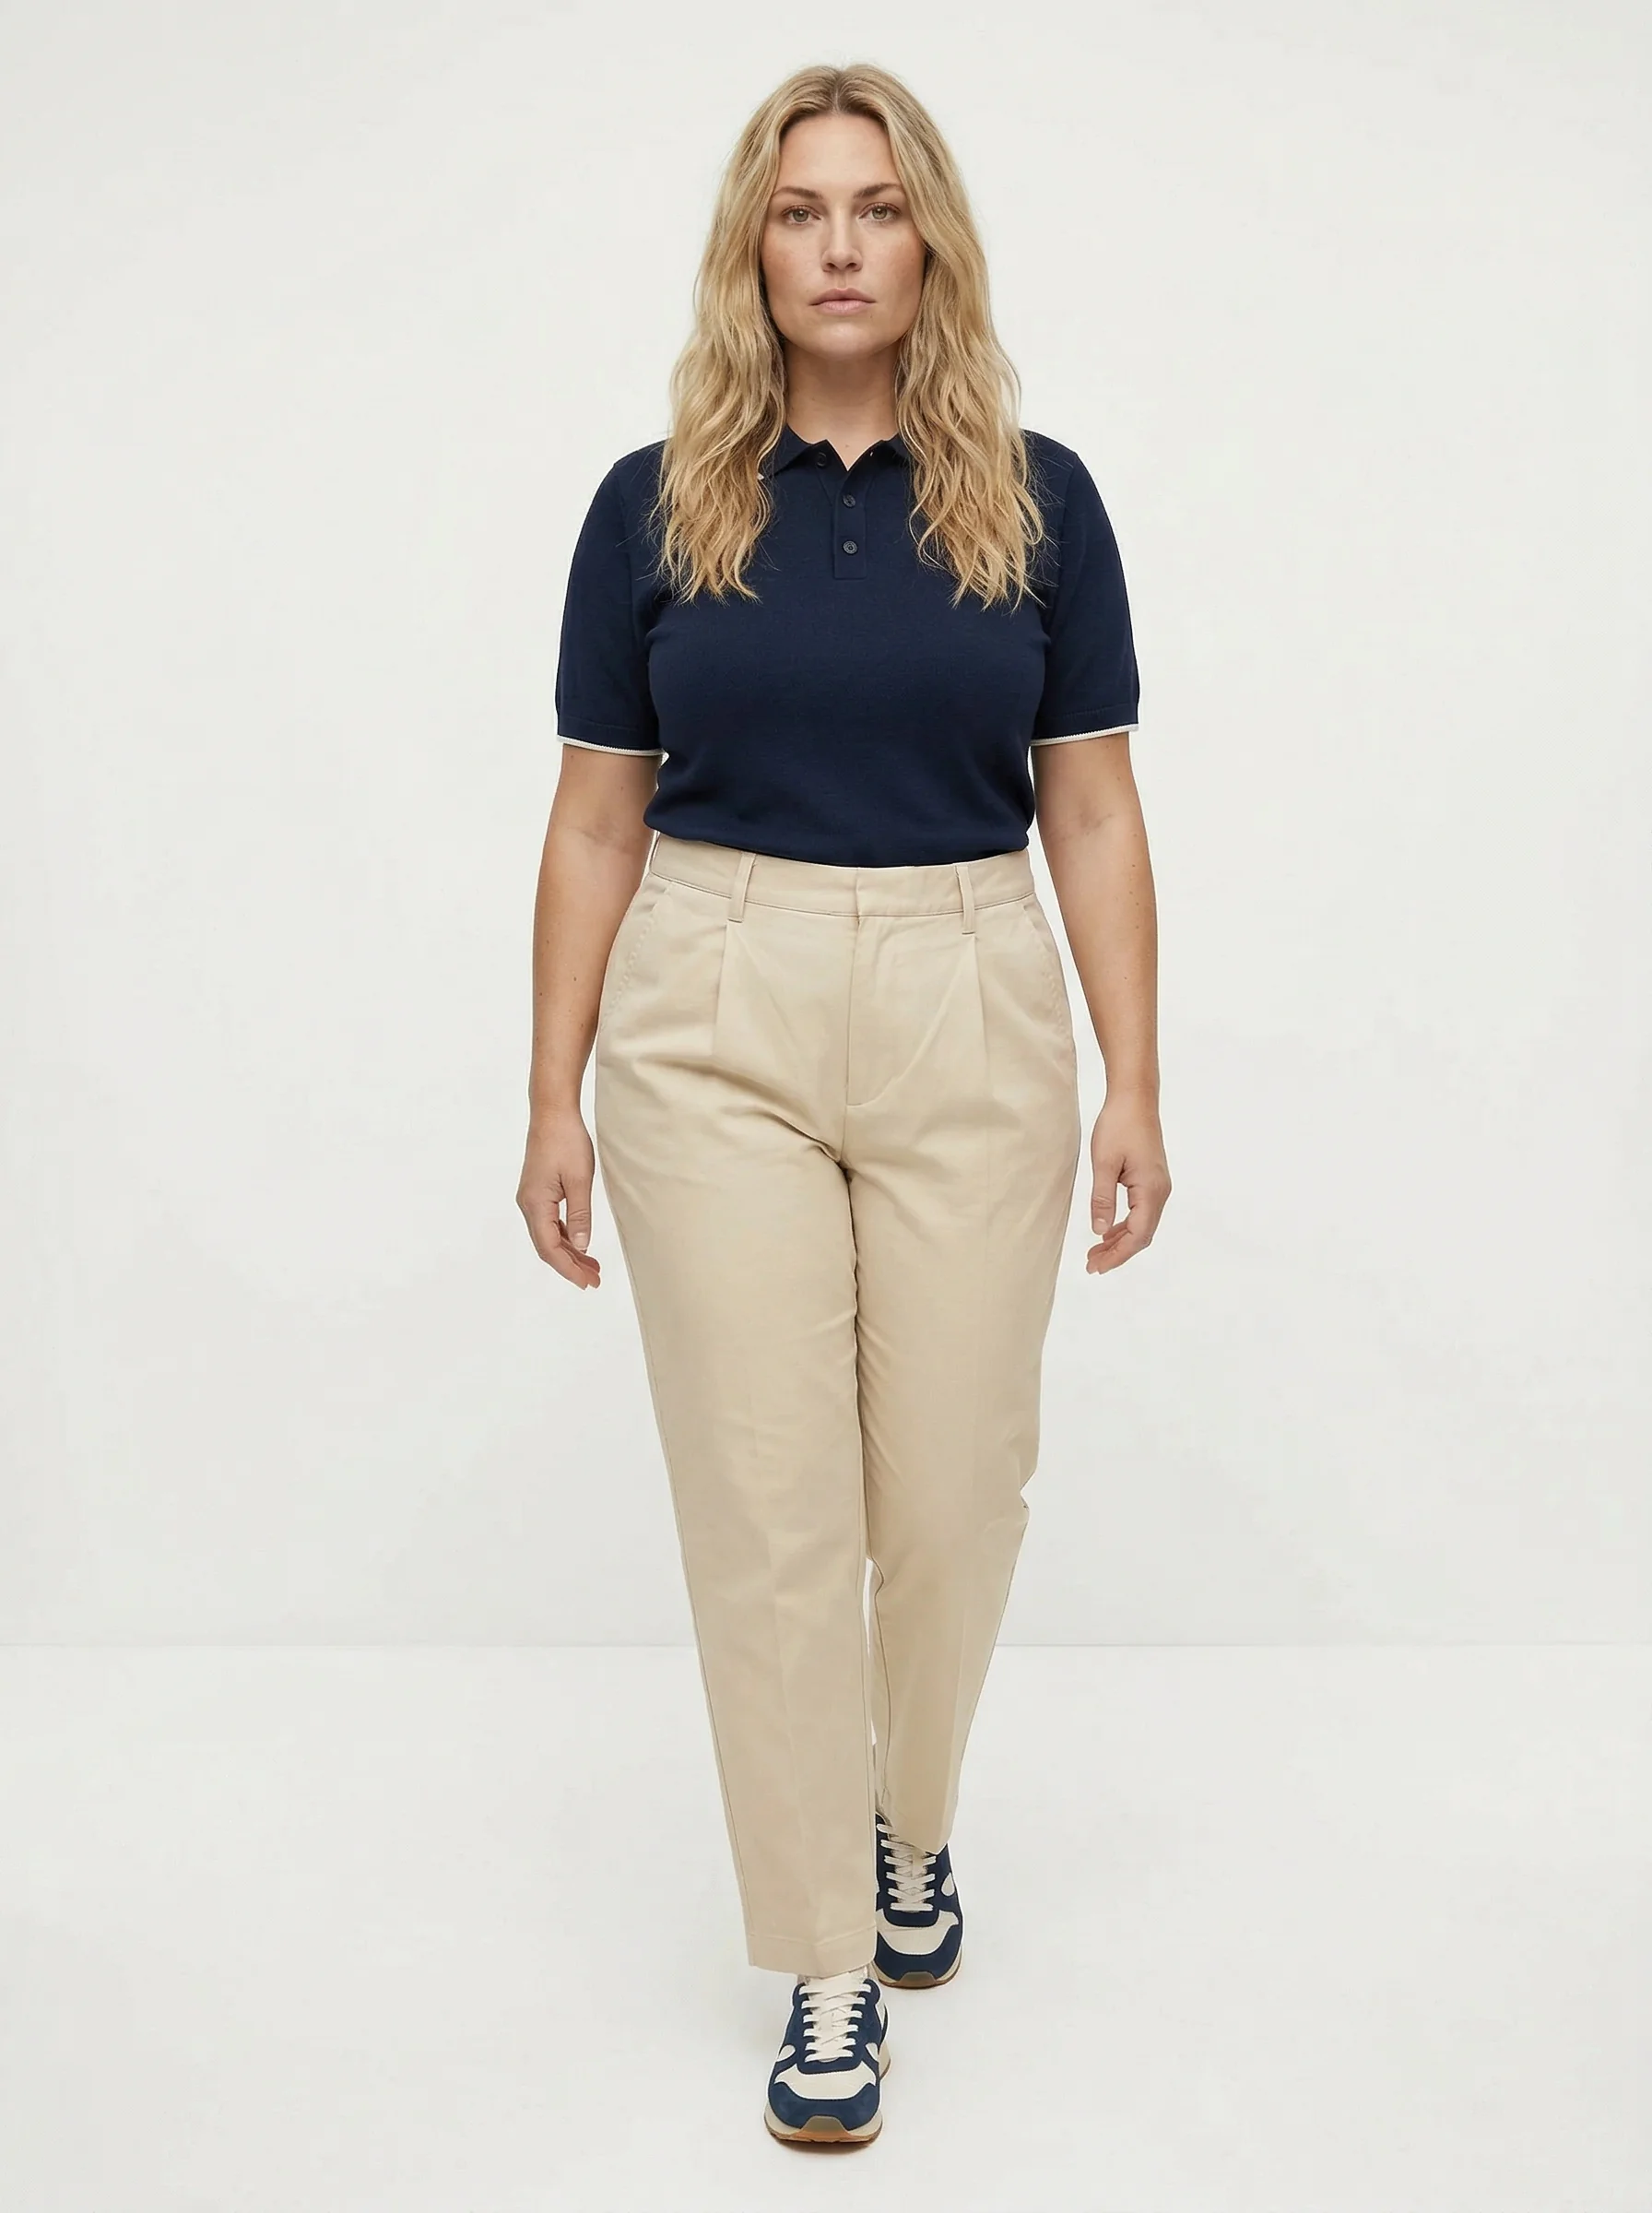
AI Product Photography for Shopify: Before and After Results
The examples below show real transformations available in On-Model. Flat-lay garment inputs (left) become professional on-model product images (right) using default AI identities.
These images are generated in under 2 minutes per look and are production-ready for Shopify product pages.
Tips for Maximizing Conversion with AI-Generated Images
1. Use the Same Identity Across Your Catalog
Shoppers build trust when they see a consistent model across your collection. Select one or two AI identities and use them for your entire catalog.
2. Generate Multiple Angles
For each product, generate 2–3 variations:
- Main image: Front-facing, white background (for search results and catalog)
- Secondary: Three-quarter turn (shows garment shape and drape)
- Lifestyle: Contextual background (for social sharing and editorial content)
3. Maintain White Backgrounds for Main Images
Shopify’s product search and collection pages work best with consistent white-background main images. Use AI-generated lifestyle shots as secondary images.
4. Include Alt Text for SEO
Every product image should have descriptive alt text. Include the product name, color, and style:
- Good: “Women’s black wool blazer worn by model, front view”
- Bad: “product-image-1.jpg”
5. Optimize File Size
Shopify’s 20MB limit is generous, but page speed matters for SEO and conversion. Compress images to WebP format — On-Model outputs at ~200–500KB per image in 2K quality, which is already optimized for web.
What’s Next
Start with On-Model’s free tier to test the quality against your specific products. Upload a few of your best-selling items, generate on-model images, and compare conversion rates against your existing photos.
Ready to start? Sign up at on-model.com — 50 free credits, no credit card required.
For more detailed guides:
- Ghost Mannequin vs On-Model AI
- From Flat-Lay to Lookbook Without a Studio
- How to Replace Models in Product Photos
Sources
- Shopify, “Product Photography Best Practices,” accessed March 2026. shopify.com/blog
- BigCommerce, “E-Commerce Product Photography Statistics 2025,” accessed March 2026.
- Shopify Admin API Reference, “Product Image,” accessed March 2026. shopify.dev