Transforming flat lay to lookbook quality imagery is now possible for any brand — without a studio, photographer, or model booking. Almost every fashion brand has flat-lay product photos already; the challenge is turning them into editorial content that actually sells.
What most brands don’t have is lookbook content — editorial-quality imagery showing complete outfits on models in styled settings. Traditional lookbook shoots require photographers, models, stylists, studios, creative directors, and weeks of production planning. The result: most small and mid-size brands skip lookbook content entirely, leaving their marketing campaigns visually thin.
On-Model’s preset system changes this equation. Using your existing flat-lay photos as input, you can generate editorial-quality lookbook imagery in minutes — with consistent AI identities, styled backgrounds, and professional-grade output.
What You’ll Need
- Flat-lay product images — individual garments photographed flat (top, bottom, shoes). Clean white backgrounds work best.
- An On-Model account — sign up free
- A few minutes per look
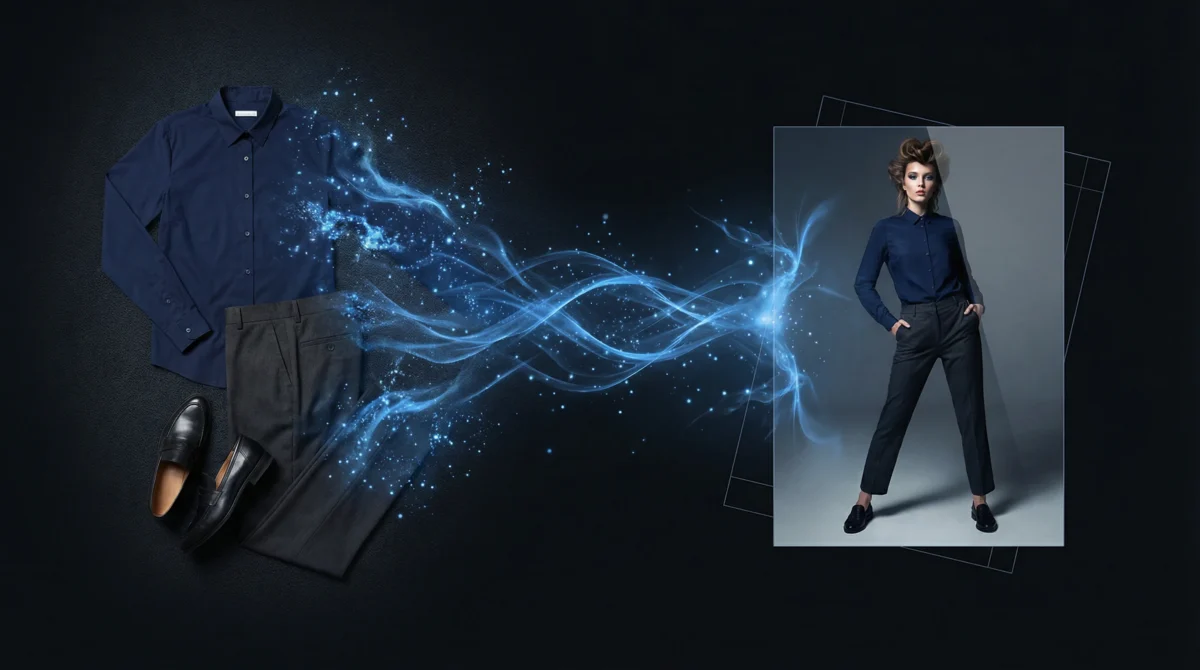
For this guide, we used three flat-lay garment inputs (a top, bottoms, and shoes) from our product image library, combined into a single outfit on the Sienna AI identity.
Understanding Presets: PDP vs Lifestyle vs Editorial
On-Model offers preset categories that control the photography style of your output:
| Preset | Purpose | Background | Pose | Best For |
|---|---|---|---|---|
| PDP | Product detail page | Clean white studio | Standard front-facing | E-commerce listings, marketplace compliance |
| Lifestyle | Contextual setting | Real-world environments | Natural, relaxed | Social media, email campaigns, blog content |
| Editorial | High-fashion aesthetic | Dramatic or minimal | Fashion-forward | Lookbooks, brand campaigns, press kits |
| Social | Optimized for social platforms | Varied, engaging | Dynamic, attention-grabbing | Instagram, TikTok, Pinterest |
For a lookbook, you’ll primarily use editorial and lifestyle presets — but generating a PDP version alongside gives you assets for every channel from the same input.
Step 1: Choose Your Outfit Composition
Lookbooks tell a story through complete outfits, not individual garments. Select 3–5 garments that work together:
For this guide, we composed an outfit from three flat-lay product images:
Outfit Composition Tips
- Keep it cohesive — Colors, styles, and occasions should match (don’t pair a formal blazer with gym shorts)
- Include at least a top and bottom — The AI performs best when the full outfit is represented
- Shoes are optional but recommended — They complete the look and prevent the AI from defaulting to generic footwear
- Accessories are additive — Bags, scarves, and hats can be included as additional inputs
Step 2: Select and Configure Your Preset
For a lookbook spread, we want editorial-quality output. Configure your generation:
- Identity: Sienna (
default-pro-db59eb3f) — a Pro-tier identity not previously used in blog content, selected for its editorial-friendly look - Preset: Editorial — dramatic lighting, fashion-forward posing
- Size: 2K (sufficient for print lookbooks and high-res web)
- Aspect ratio: 3:4 (portrait — standard for fashion lookbooks)
Step 3: Generate Your Lookbook Spread
Upload your flat-lay images, select Sienna as the identity, apply your chosen preset, and generate. Processing takes 60–120 seconds for a flat-to-model generation.
Your Results
Here’s the real output — three flat-lay garments transformed into an editorial on-model lookbook image:
What the AI Delivered
- Complete outfit rendering — All three garments appear on the model as a cohesive outfit
- Realistic draping — Fabric behaves naturally, with wrinkles and folds matching the garment type
- Professional-grade composition — The output matches the quality expected for a fashion lookbook
- Identity consistency — Sienna’s features remain consistent across any number of generations
Building a Full Flat Lay to Lookbook Campaign
A single editorial image is a start. A lookbook typically needs 8–12 looks with variation in styling, pose, and mood. Here’s how to scale:
Multiple Poses from the Same Outfit
Use the instructions array feature to generate 3–4 variations from one set of inputs:
| Variation | Pose | Background | Use Case |
|---|---|---|---|
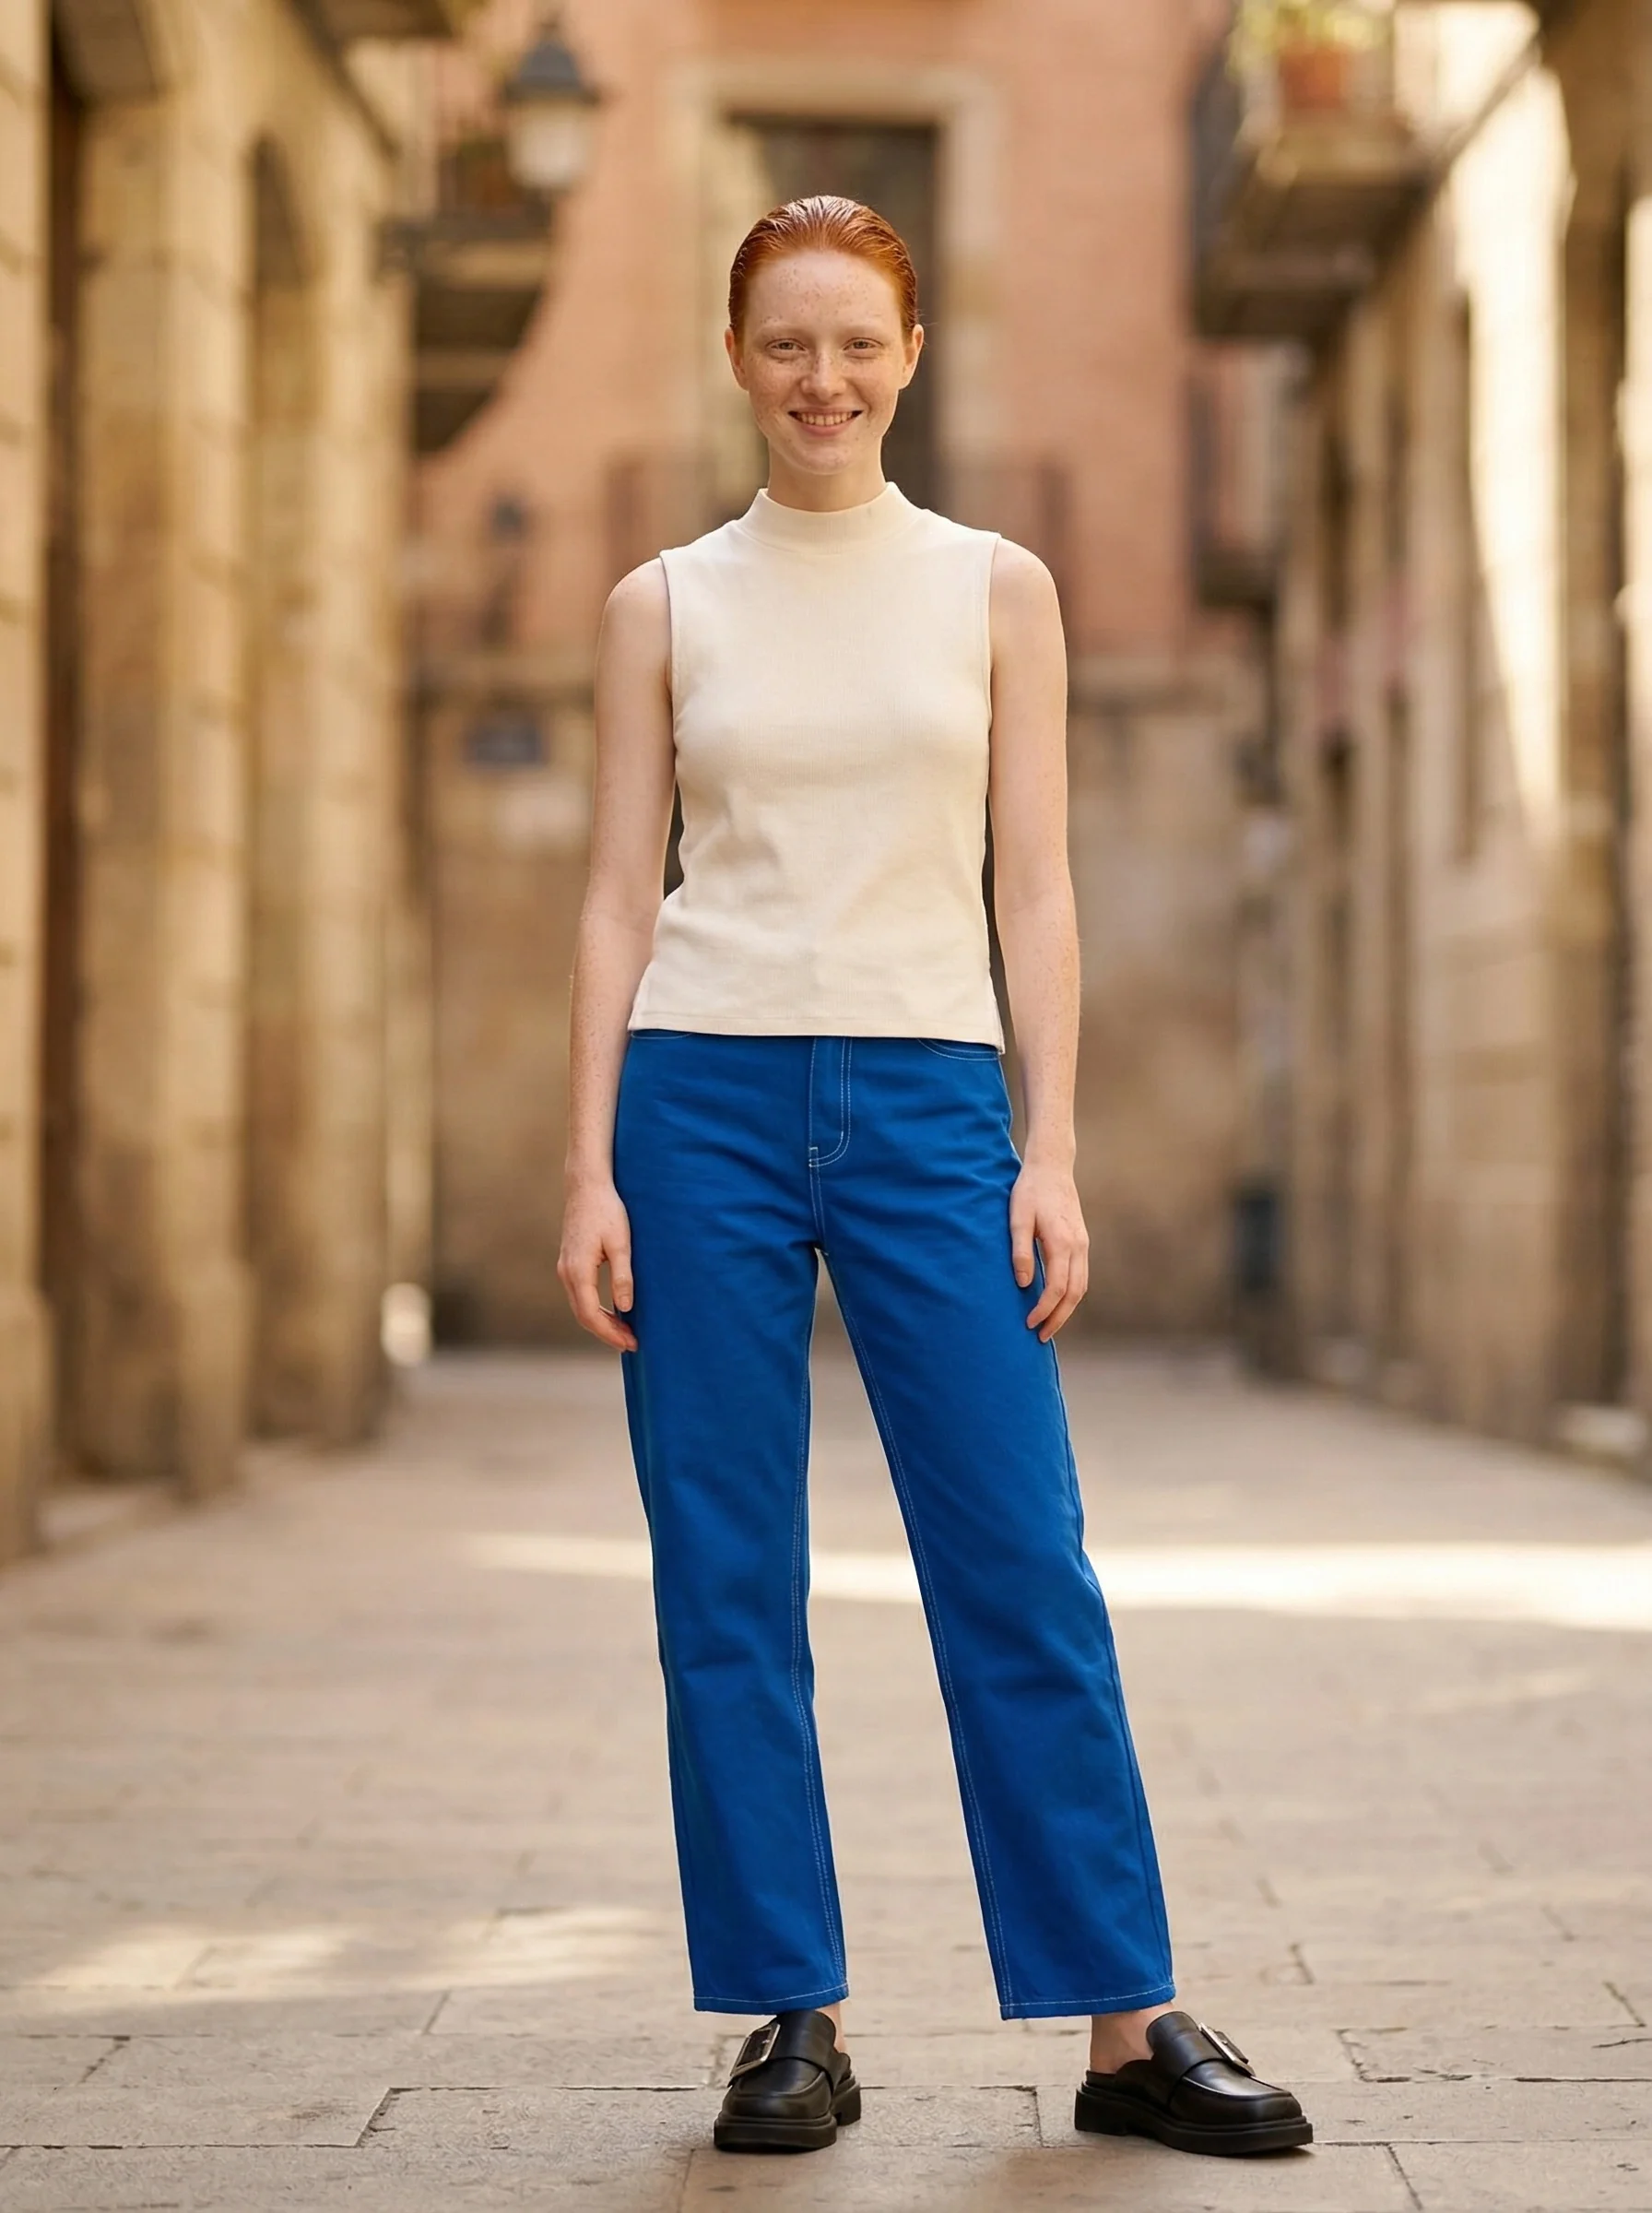
| 1 | Front-facing, relaxed | White studio | PDP / clean catalog |
| 2 | Three-quarter turn, confident | Light gray gradient | Lookbook cover |
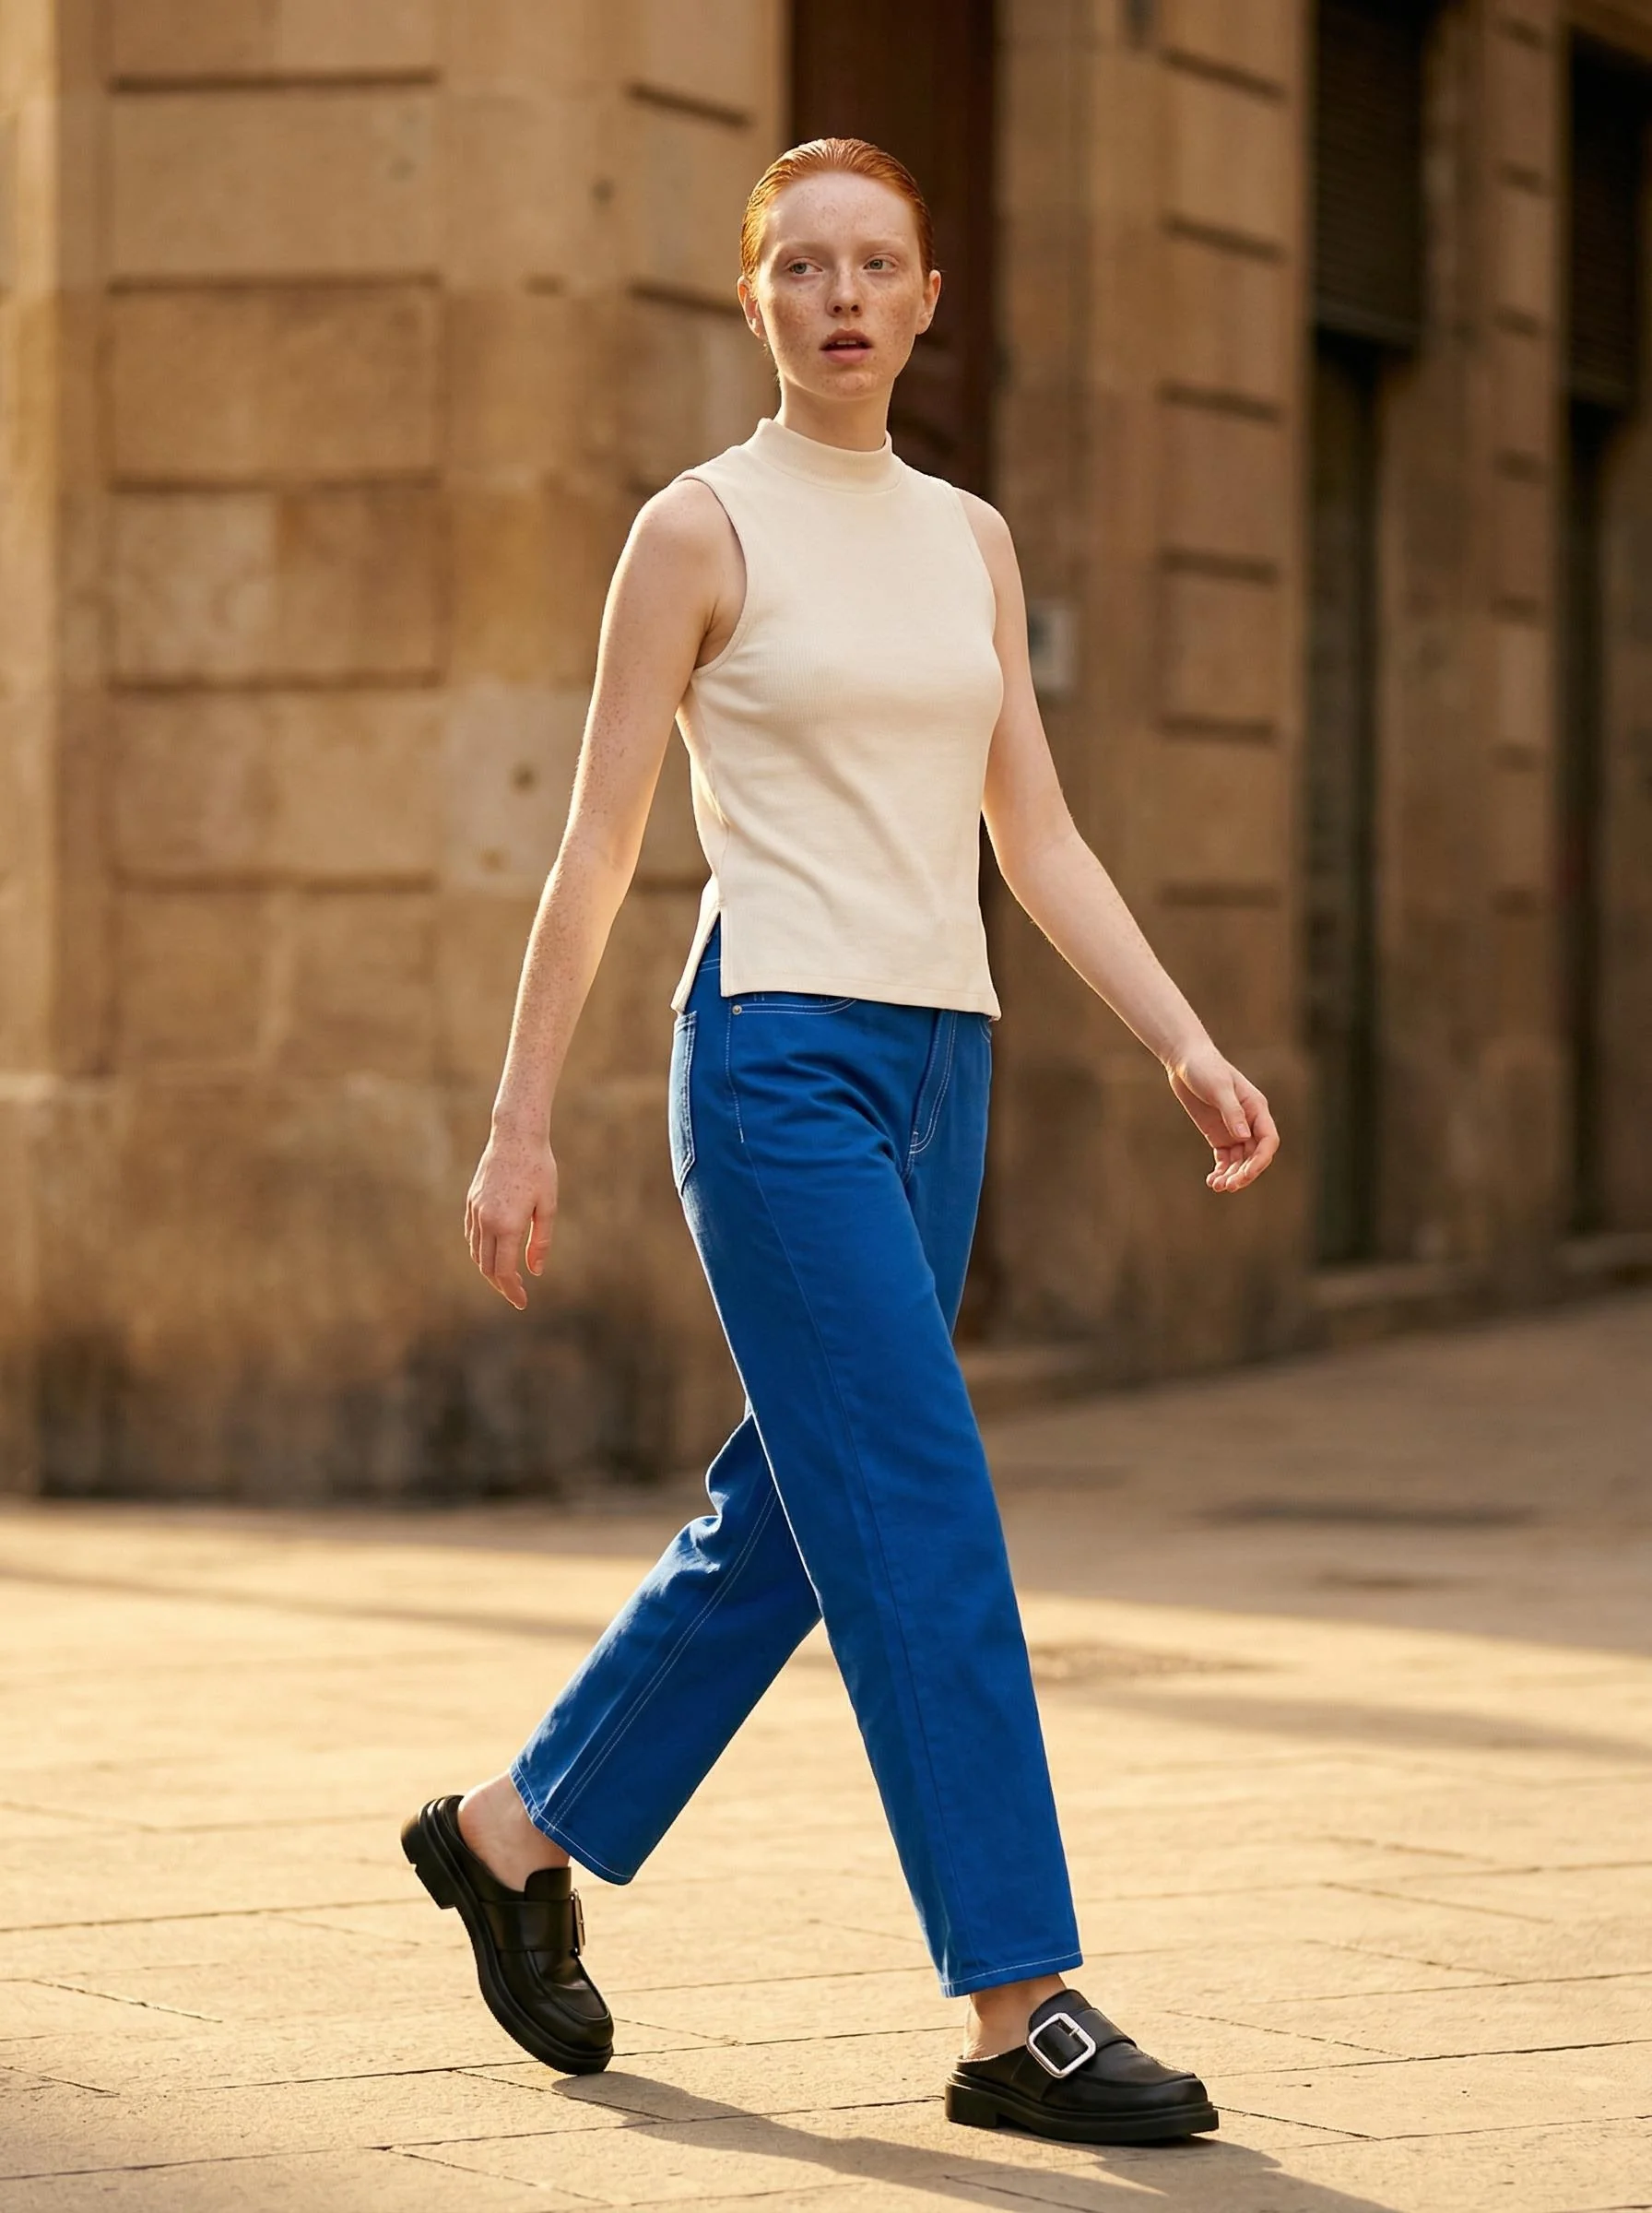
| 3 | Walking, side angle | Urban outdoor | Lifestyle variant |
| 4 | Fashion editorial stance | Dark studio (#0a0a0a) | High-drama editorial |
Multiple Outfits with the Same Identity
Swap out the flat-lay inputs while keeping the same identity. Sienna appears across all looks, creating the visual thread that makes a lookbook feel cohesive.
Adding Seasonal Context
Layer seasonal presets on top of your editorial compositions:
- Spring collection — Garden or daylight backgrounds, soft natural lighting
- Summer campaign — Bright outdoor settings, high-energy poses
- Autumn editorial — Warm-toned urban environments, golden-hour lighting
- Winter lookbook — Indoor/intimate settings, dramatic contrast
Tips for Cohesive Lookbook Storytelling
1. Lock One Identity
The fastest way to break visual cohesion is to use different AI identities across looks. Pick one identity (or at most two — one per gender) and commit to it for the entire lookbook.
2. Use a Consistent Background Palette
Even with varied backgrounds, keep the color palette consistent. All editorial shots with dark backgrounds, or all lifestyle shots with earth tones — mixing randomly destroys the visual narrative.
3. Arrange Looks in a Visual Arc
Order your lookbook from casual to formal, or from light to dark, or from simple to complex. Tell a visual story through the sequence, just as a styled photoshoot would.
4. Include Close-Up Details
Pair your full-body lookbook images with close-up flat-lay shots of fabric texture, hardware, and detailing. These aren’t AI-generated — they come from your existing product photography. The combination of AI-generated lookbook images and real detail shots creates a compelling, professional spread.
5. Export at Print Resolution
If your lookbook will be printed (PDF, physical catalog), generate at 2K or 4K resolution. On-Model’s 4K output is sufficient for standard print sizes at 300 DPI.
What’s Next
You now have the workflow to transform any collection of flat-lay product photos into a professional lookbook — without a studio, photographer, or model booking.
Start creating your lookbook at app.on-model.com with 50 free credits. For related guides, see AI Product Photography for Shopify, Ghost Mannequin vs On-Model AI, or Seasonal Fashion Photography.
Sources
- Business of Fashion, “The Lookbook Reinvented: AI and Digital Fashion Content,” February 2026.
- WGSN, “Fashion Content Strategy 2026,” accessed March 2026.
- PiktID, “On-Model Flat-to-Model Preset Documentation,” docs.piktid.com.