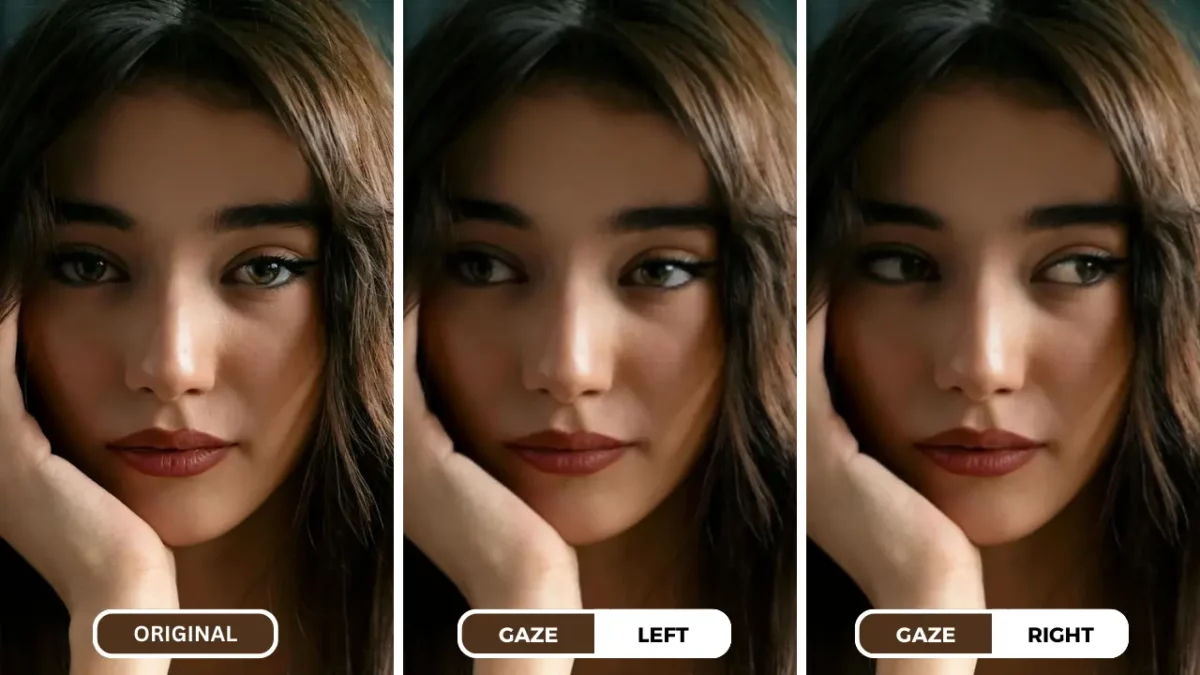
Die Bedeutung der Blickrichtung verstehen
Die emotionale Wirkung von Augenkontakt
Die Augen werden oft als die Fenster zur Seele bezeichnet, und das aus gutem Grund. Sie sind ein mächtiges Werkzeug, um Emotionen zu vermitteln und eine Verbindung zum Betrachter herzustellen. Ein direkter Blick kann Vertrauen, Autorität oder Intimität vermitteln, während abgewandte Augen Schüchternheit, Nachdenklichkeit oder den Wunsch nach Privatsphäre suggerieren. Die Richtung und Intensität des Blicks einer Person kann die Gesamtaussage und Wirkung eines Bildes erheblich beeinflussen. Heutzutage können Sie mit einer App die Blickrichtung ändern und so die Emotionen Ihres Motivs zum Leben erwecken.
Komposition und Geschichtenerzählen
Die Blickrichtung spielt eine entscheidende Rolle bei der Komposition und Erzählung eines Fotos. Durch die strategische Platzierung der Augen des Motivs innerhalb des Bildes können Fotografen die Aufmerksamkeit des Betrachters lenken und ein Gefühl der Fokussierung erzeugen. Ein Motiv, das direkt in die Kamera blickt, kann beispielsweise eine starke Verbindung zum Betrachter herstellen, während ein Blick, der auf etwas anderes gerichtet ist, ein Gefühl des Geheimnisses oder der Faszination vermitteln kann.
Darüber hinaus kann die Blickrichtung verwendet werden, um eine Geschichte zu erzählen oder eine bestimmte Botschaft zu vermitteln. Ein Motiv, das von der Kamera wegschaut, kann einen Moment des Nachdenkens oder der Selbstbeobachtung andeuten, während Augen, die auf eine andere Person oder ein Objekt gerichtet sind, ein Gefühl der Interaktion oder des Konflikts vermitteln können.
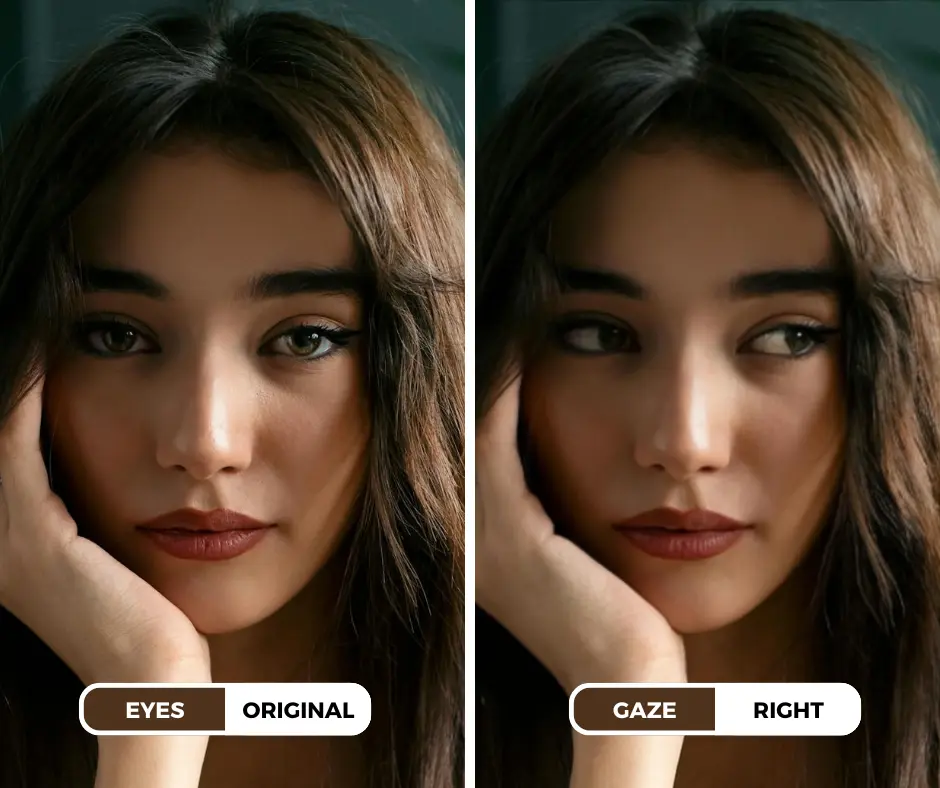
Einführung von EraseID: Die ultimative App zum Ändern der Blickrichtung
EraseID ist die beste AI-Änderung der Blickrichtung für Vermarkter da es ein umfassendes Fotobearbeitungstool bietet, das die Leistung der künstlichen Intelligenz (KI) nutzt, um Ihre Bilder zu verbessern. Mit seinen fortschrittlichen Algorithmen und der intuitiven Benutzeroberfläche bietet EraseID eine breite Palette von Funktionen, darunter die Möglichkeit, Gesichtsausdrücke zu ändern, die Beleuchtung anzupassen und verschiedene Filter und Effekte anzuwenden. Sie können Probieren Sie dieses erstaunliche Augenöffner-Tool zahlreiche Optionen für die Bearbeitung von Gesichtern mit Hilfe der KI.
Hauptmerkmale für die Manipulation der Blickrichtung:
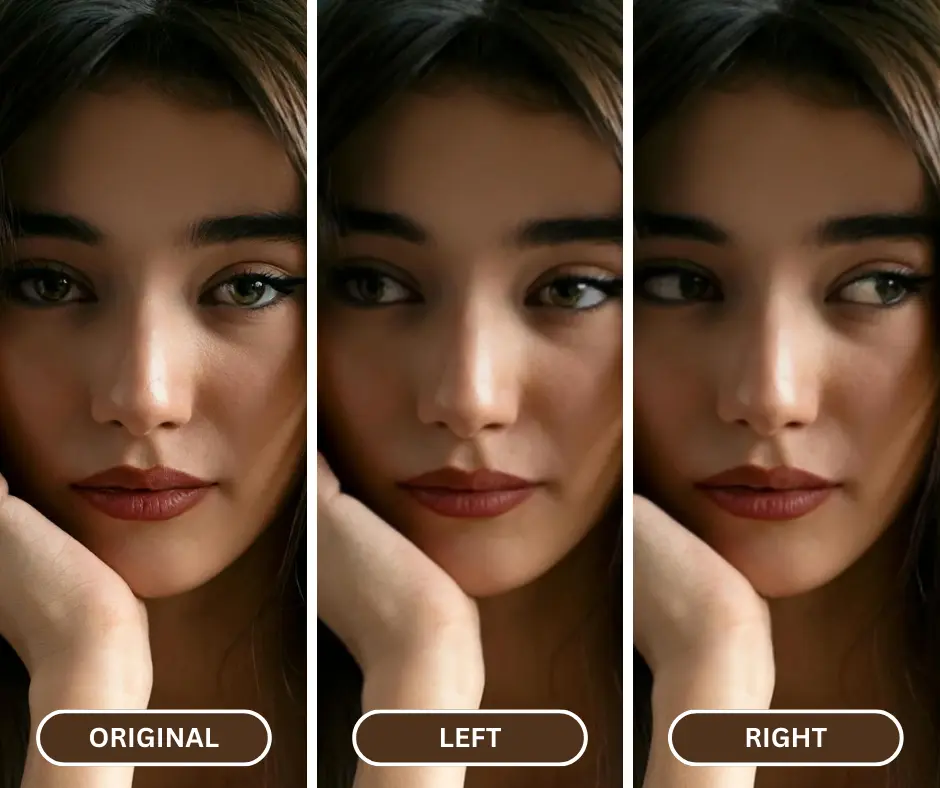
- Ausdruck ändern: Mit dieser Funktion können Sie die Gesichtszüge präzise bearbeiten, einschließlich des Blicks, der Position und sogar des Aussehens geschlossener Augen.
- KI-gestützte Genauigkeit: Die KI-Algorithmen von EraseID sind darauf ausgelegt, die Gesichtszüge genau zu analysieren und entsprechende Anpassungen vorzunehmen, um natürlich aussehende Ergebnisse zu gewährleisten.
- Anpassungsoptionen: EraseID bietet eine Reihe von Anpassungsoptionen, mit denen Sie die Richtung und die Intensität des Auges fein abstimmen können, um den gewünschten Effekt zu erzielen.
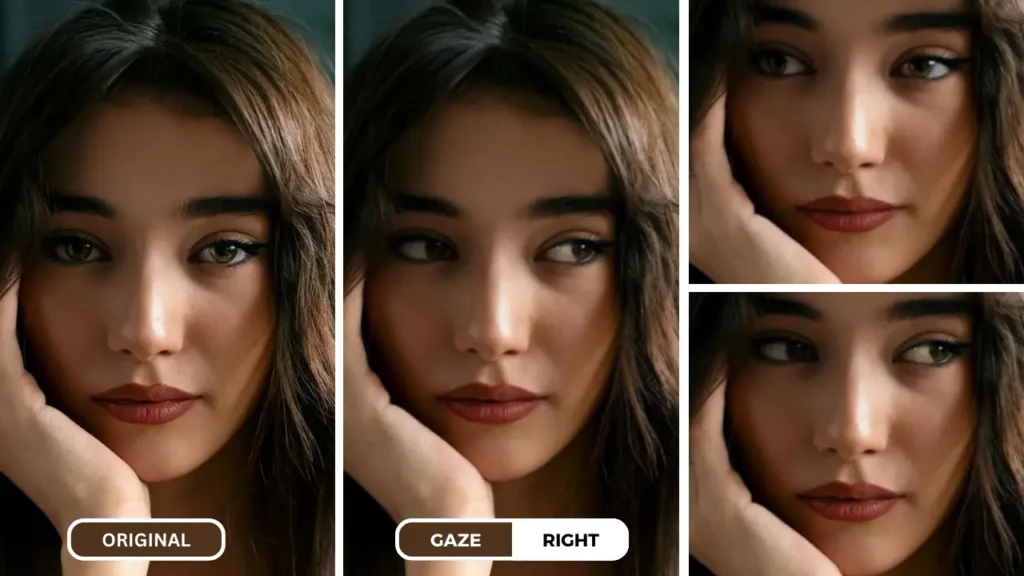
Wie EraseID funktioniert:
Die KI-Technologie von EraseID analysiert die Gesichtszüge und identifiziert Schlüsselpunkte wie Augenwinkel, Augenbrauen und Mund. Durch das Verständnis dieser Zusammenhänge kann die KI Gesichtsausdrücke präzise manipulieren und natürlich wirkende Ergebnisse erzeugen.
Die Algorithmen von EraseID werden kontinuierlich an umfangreichen Bilddatenbanken trainiert, sodass sie lernen und sich an unterschiedliche Gesichtsstrukturen und Lichtverhältnisse anpassen können. Dadurch wird sichergestellt, dass das Tool eine Vielzahl von Bildern effektiv verbessern kann und konsistente, hochwertige Ergebnisse liefert.
Schritt-für-Schritt-Anleitung: Mit der EraseID-App die Blickrichtung ändern
1. Anmelden:
Besuchen Sie die EraseID Website und erstellen Sie ein kostenloses Konto. Wenn Sie bereits ein Konto haben, melden Sie sich an.
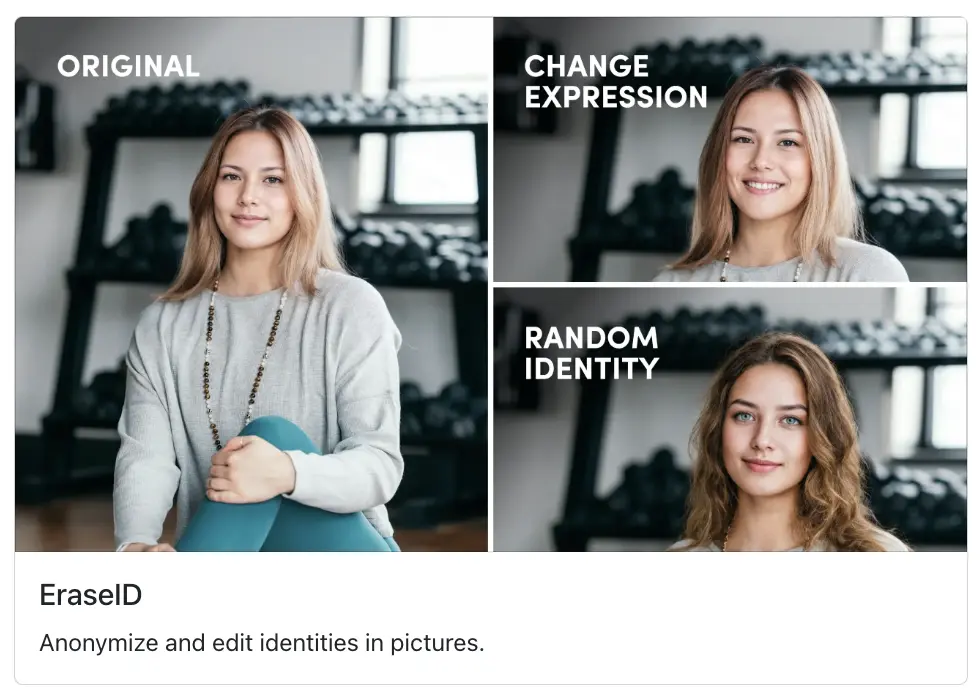
2. Bild hochladen:

Click on the “Bild hochladen" und wählen Sie das zu bearbeitende Foto von Ihrem Gerät aus. Achten Sie darauf, dass das Bild von hoher Qualität ist, um optimale Ergebnisse zu erzielen.
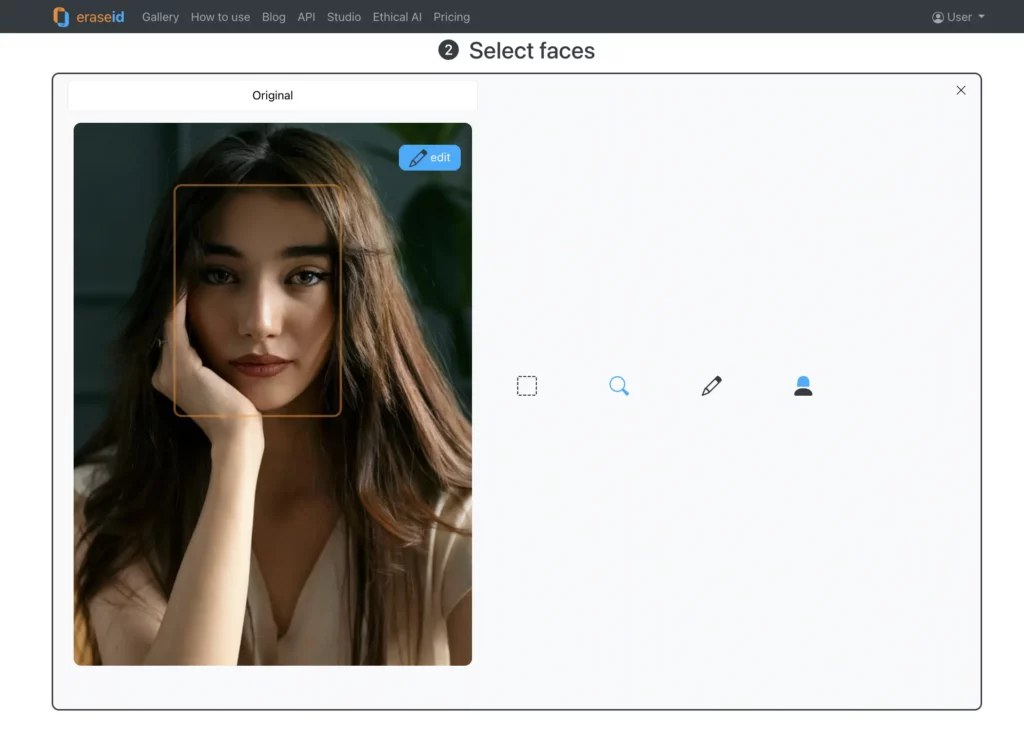
3. Wählen Sie "Ausdruck ändern":
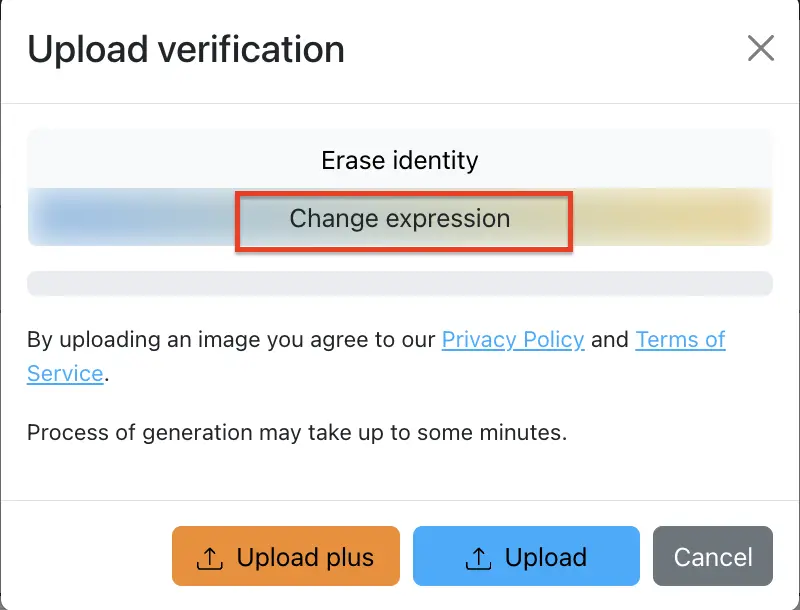
Suchen Sie die "Ausdruck ändern"Funktion innerhalb der EraseID-Schnittstelle. Mit dieser Funktion können Sie verschiedene Gesichtsmerkmale, einschließlich der Augenrichtung, ändern.
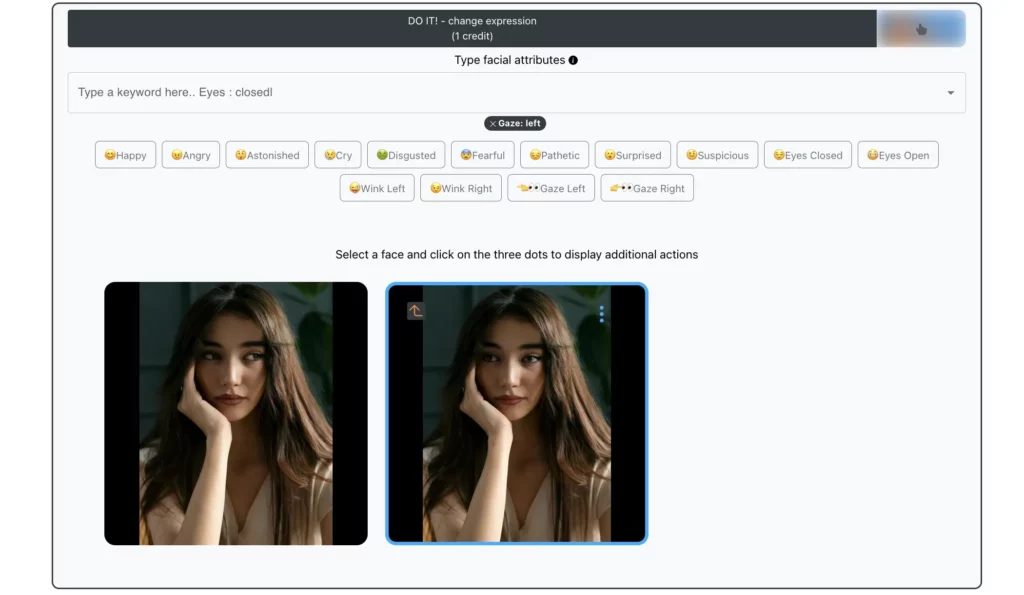
4. Augenrichtung einstellen:
- Click on the “Blick" innerhalb der Option "Ausdruck ändernFunktion".
- Wählen Sie zwischen "links" oder "rechts", um die Blickrichtung des Motivs anzupassen. Sie können auch den Schieberegler verwenden, um die Intensität der Änderung der Blickrichtung zu steuern.

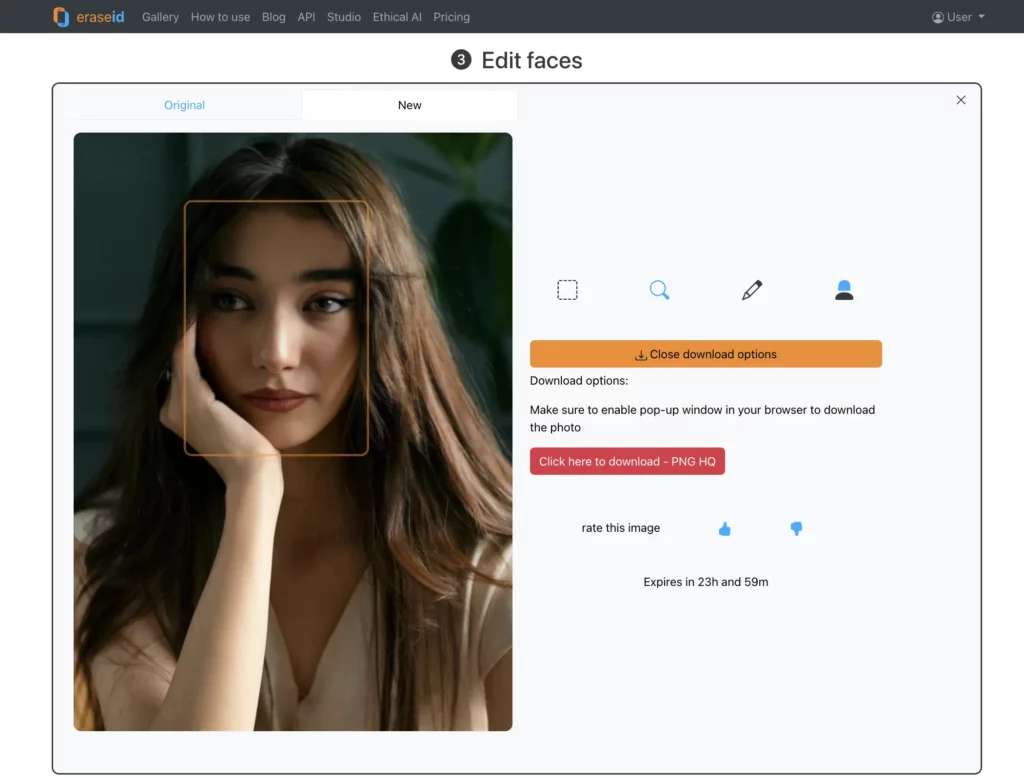
5. Vorschau und Download:
- Sobald Sie die gewünschten Anpassungen vorgenommen haben, sehen Sie sich das bearbeitete Bild in der Vorschau an, um sicherzustellen, dass Sie mit dem Ergebnis zufrieden sind.
- Nehmen Sie bei Bedarf weitere Anpassungen an der Augenrichtung oder anderen Gesichtszügen vor.
- Wenn Sie mit dem bearbeiteten Bild zufrieden sind, klicken Sie auf die Schaltfläche "Herunterladen", um sie auf Ihrem Gerät zu speichern.
Wenn Sie diese einfachen Schritte befolgen, können Sie die EraseID-App effektiv nutzen, um die Blickrichtung in Ihren Fotos zu ändern und ansprechende und visuell ansprechende Bilder zu erstellen.
Vorteile der Verwendung von EraseID
Benutzerfreundlichkeit:
- Intuitive Schnittstelle: EraseID verfügt über eine benutzerfreundliche Oberfläche, die eine einfache Navigation und Verwendung ermöglicht, selbst für diejenigen, die noch keine Erfahrung mit der Fotobearbeitung haben.
- Einfacher Arbeitsablauf: Der Prozess des Hochladens von Bildern, der Anpassung von Gesichtsmerkmalen und des Herunterladens der bearbeiteten Ergebnisse ist einfach und intuitiv.
- Minimale technische Kenntnisse erforderlich: Es sind keine fortgeschrittenen technischen Kenntnisse erforderlich, um EraseID effektiv zu nutzen.
KI-gestützte Genauigkeit:
- Natürlich aussehende Ergebnisse: Die KI-Algorithmen von EraseID sind auf einem riesigen Datensatz von Bildern trainiert, so dass sie Gesichtsmerkmale genau analysieren und natürlich wirkende Anpassungen vornehmen können.
- Präzision und Konsistenz: Die KI-Technologie sorgt dafür, dass die Änderungen an der Blickrichtung präzise und konsistent sind, sodass unnatürliche oder verzerrte Ergebnisse vermieden werden.
- Zeitersparnis: KI-gestützte Tools können viele Aufgaben automatisieren und so im Vergleich zu manuellen Bearbeitungstechniken Zeit sparen.
Zeitersparnis:
- Effizienter Arbeitsablauf: EraseID vereinfacht die Bearbeitung von Gesichtszügen und ermöglicht es Ihnen, die gewünschten Ergebnisse schnell und effizient zu erzielen.
- Reduzierter manueller Aufwand: Durch die Automatisierung von Aufgaben wie der Anpassung der Blickrichtung reduziert EraseID den Bedarf an manuellen Eingriffen und spart Ihnen Zeit.
- Fokus auf Kreativität: Mit EraseID können Sie weniger Zeit auf technische Aspekte verwenden und sich mehr auf die kreativen Aspekte Ihrer Fotografie konzentrieren.
Zusammenfassend lässt sich sagen, dass EraseID eine bequeme und effektive Lösung zur Verbesserung von Gesichtsmerkmalen, einschließlich der Augenrichtung, darstellt. Seine Benutzerfreundlichkeit, die KI-gestützte Genauigkeit und die zeitsparenden Vorteile machen es zu einem wertvollen Werkzeug für Fotografen und Content-Ersteller. Sie können einen Blick auf den Leitfaden werfen auf wie man die Augen in der Foto-App öffnet.
Weitere zu erforschende Funktionen
SuperID:
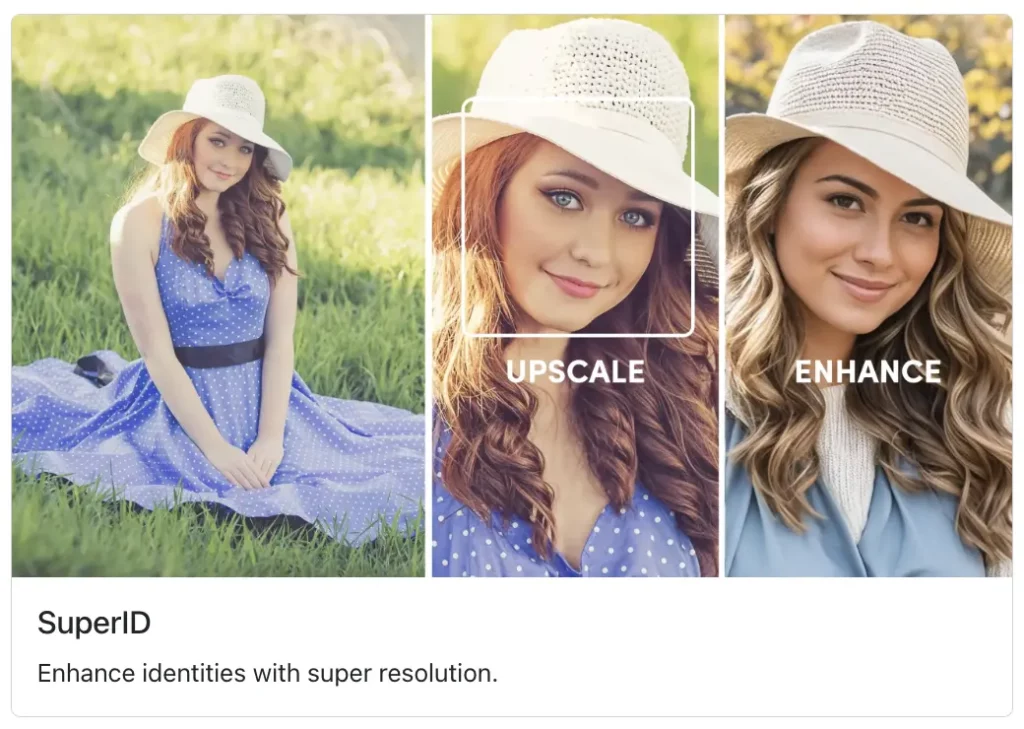
Neben der Manipulation der Blickrichtung bietet EraseID weitere Funktionen zur Verbesserung Ihrer Bilder. Eine solche Funktion ist SuperIDdie zur Verbesserung der Gesichtsdetails und der allgemeinen Bildqualität entwickelt wurde. Durch die Anwendung von SuperID, können Sie:
- Verbessern Sie die Gesichtszüge: Lassen Sie die Gesichtszüge Ihres Motivs schärfer, klarer und deutlicher erscheinen.
- Reduzieren Sie Lärm: Entfernen Sie unerwünschte Körnigkeit und Rauschen aus Ihren Bildern, insbesondere aus solchen, die bei schlechten Lichtverhältnissen aufgenommen wurden.
- Verbessert den Hautton: Verbessert die Hauttextur und gleicht den Hautton aus, um das Aussehen zu verbessern.
ProduktID:
Eine weitere wertvolle Funktion von EraseID ist ProduktID, mit der Sie den Hintergrund Ihrer Bilder ändern können. Dies kann nützlich sein, um Produktfotos mit einem einheitlichen und professionellen Hintergrund zu erstellen oder um unerwünschte Elemente aus Ihren Bildern zu entfernen. Mit ProductID können Sie den Hintergrund ganz einfach durch eine Volltonfarbe, einen Farbverlauf oder sogar ein anderes Bild ersetzen.
Wenn Sie diese zusätzlichen Funktionen erkunden, können Sie Ihre Bilder weiter verbessern und mit EraseID visuell beeindruckende Ergebnisse erzielen. Werfen Sie einen Blick auf unseren Leitfaden über Wie man den Hintergrund eines Bildes ändert

Ändern der Blickrichtung in Photoshop: Eine Schritt-für-Schritt-Anleitung
1. Öffnen Sie das Bild und erstellen Sie eine Duplizierebene:
- Öffnen Sie das Bild, das Sie bearbeiten möchten, in Photoshop.
- Duplizieren Sie die Ebene, indem Sie auf Ebene > Ebene duplizieren gehen. Dadurch bleibt das Originalbild erhalten und Sie können nicht-destruktive Bearbeitungen vornehmen.
2. Wählen Sie die Augen:
Verwenden Sie das Lasso-Werkzeug oder das Schnellauswahl-Werkzeug, um die Augen sorgfältig auszuwählen. Verfeinern Sie die Auswahl bei Bedarf mit dem Werkzeug "Kante verfeinern".
3. Wenden Sie das Verflüssigungswerkzeug an:
- Gehen Sie zu Filter > Verflüssigen, um auf das Verflüssigen-Werkzeug zuzugreifen. Mit diesem Werkzeug können Sie Teile eines Bildes verzerren und deformieren.
- Verwenden Sie das Werkzeug "Vorwärtsverkrümmung", um die Position und Richtung der Augen vorsichtig anzupassen. Seien Sie vorsichtig, um unnatürliche Verzerrungen zu vermeiden.
4. Verfeinern Sie die Ränder:
- Wenn sich das Verflüssigen-Werkzeug auf Bereiche außerhalb der Augen auswirkt, verwenden Sie eine Maske, um die Auswahl zu verfeinern und die Änderungen nahtlos mit dem Rest des Bildes zu verbinden.
- Wählen Sie Ebene > Maske > Alles einblenden, um eine Vollmaske zu erstellen. Malen Sie dann mit Schwarz auf der Maske, um die Bereiche auszublenden, die nicht betroffen sein sollen.
5. Andere Funktionen einstellen:
Um ein natürliches Erscheinungsbild zu erhalten, sollten Sie auch andere Gesichtszüge wie die Kopfhaltung, die Augenlider oder die Augenbrauen an die veränderte Blickrichtung anpassen.
6. Vorschau und Speichern:
- Zeigen Sie eine Vorschau des bearbeiteten Bildes an, um sicherzustellen, dass Sie mit dem Ergebnis zufrieden sind.
- Nehmen Sie alle erforderlichen Anpassungen vor, bevor Sie das endgültige Bild speichern.
Anmerkung: Die manuelle Änderung der Blickrichtung in Photoshop erfordert Geschick und Übung. Für Anfänger oder diejenigen, die eine schnellere und automatisierte Lösung suchen, kann dies eine Herausforderung sein. In solchen Fällen kann EraseID ein wertvolles Werkzeug sein, um die Augenrichtung effizient zu ändern.
EraseID your App zum Ändern der Blickrichtung
Sind Sie bereit, Ihre Fotos mit den Möglichkeiten der KI-gestützten Blickrichtungsmanipulation zu verändern? Melden Sie sich für ein kostenloses EraseID-Konto an und erleben Sie den Unterschied aus erster Hand.
Genießen Sie 10 kostenlose Kredite wenn Sie sich anmelden, um die Funktionen von EraseID zu erkunden und zu sehen, wie es Ihre Bilder verbessern kann.
Teilen Sie Ihre Ergebnisse: Nachdem Sie EraseID verwendet haben, teilen Sie Ihre Vorher-Nachher-Fotos in den sozialen Medien und ermutigen Sie andere, dieses erstaunliche Tool auszuprobieren. Zeigen Sie der Welt die unglaublichen Ergebnisse, die Sie mit EraseID erzielen können. Lassen Sie sich diese Gelegenheit nicht entgehen, um Ihre Fotografie zu verbessern und fesselndere Bilder zu erstellen. Anmeldung für EraseID heute und entdecken Sie die Möglichkeiten!

