Understanding the Importance of Eye Direction
The Emotional Impact of Eye Contact
Eyes are often referred to as the windows to the soul, and for good reason. They are a powerful tool for conveying emotions and creating a connection with viewers. A direct gaze can communicate confidence, authority, or intimacy, while averted eyes may suggest shyness, contemplation, or a desire for privacy. The direction and intensity of a subject’s gaze can significantly influence the overall message and impact of an image. Nowadays, you can use an app to change eye direction which helps you bring life to your subject’s emotions.
Composition and Storytelling
Eye direction plays a crucial role in the composition and storytelling of a photograph. By strategically placing the subject’s eyes within the frame, photographers can guide the viewer’s attention and create a sense of focus. For example, a subject looking directly at the camera can establish a strong connection with the viewer, while a gaze directed towards something else can create a sense of mystery or intrigue.
Additionally, eye direction can be used to tell a story or convey a specific message. A subject looking away from the camera may suggest a moment of reflection or introspection, while eyes looking towards another person or object can create a sense of interaction or conflict.
Introducing EraseID: The Ultimate App to Change Eye Direction
EraseID is the Best AI Change Eye Direction for Marketers as it offers a comprehensive photo editing tool that harnesses the power of artificial intelligence (AI) to enhance your images. With its advanced algorithms and intuitive interface, EraseID offers a wide range of features, including the ability to modify facial expressions, adjust lighting, and apply various filters and effects. You can try this amazing Eye Opener Tool to edit numerous face editing options using the power of AI.
Key Features for Eye Direction Manipulation:
- Change Expression: This feature allows you to precisely manipulate facial features, including eye gaze, position, and even the appearance of closed eyes.
- AI-Powered Accuracy: EraseID’s AI algorithms are designed to accurately analyze facial features and apply appropriate adjustments, ensuring natural-looking results.
- Customization Options: EraseID provides a range of customization options, allowing you to fine-tune the eye direction and intensity to achieve your desired effect.
How EraseID Works:
EraseID’s AI technology analyzes facial features and identifies key points, such as the corners of the eyes, eyebrows, and mouth. By understanding these relationships, the AI can accurately manipulate facial expressions and create natural-looking results.
EraseID’s algorithms are continuously trained on vast datasets of images, allowing them to learn and adapt to different facial structures and lighting conditions. This ensures that the tool can effectively enhance a wide range of images and produce consistent, high-quality results.
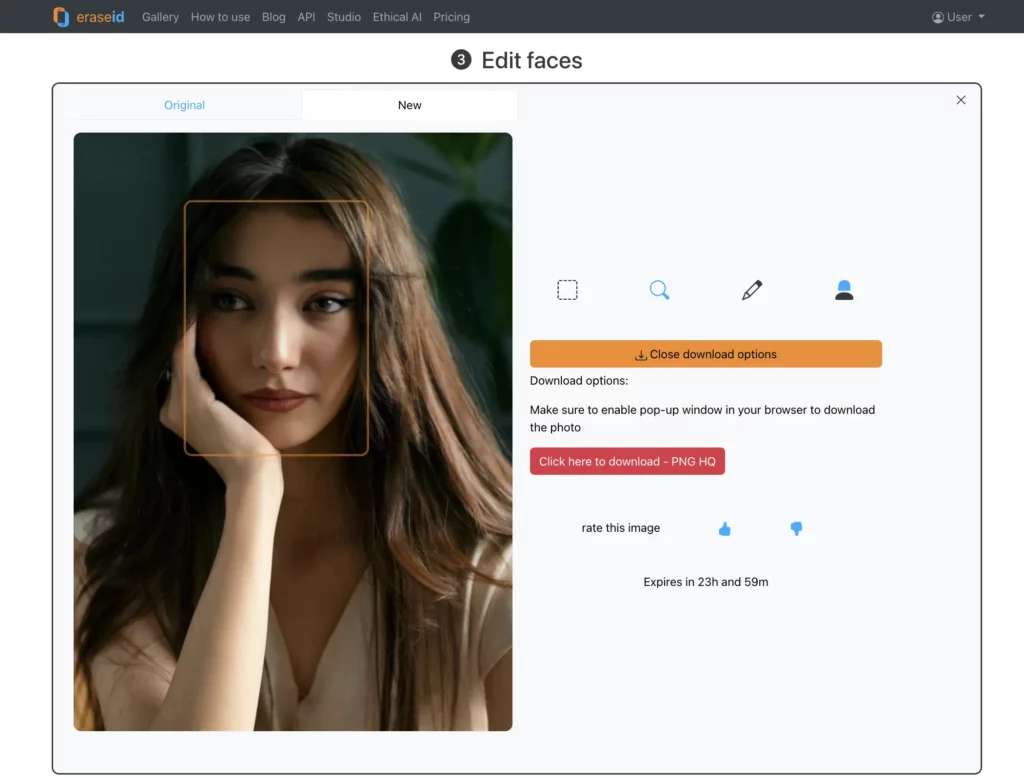
Step-by-Step Guide: Using EraseID App to Change Eye Direction
1. Sign Up:
Visit the EraseID website and create a free account. If you already have an account, log in.

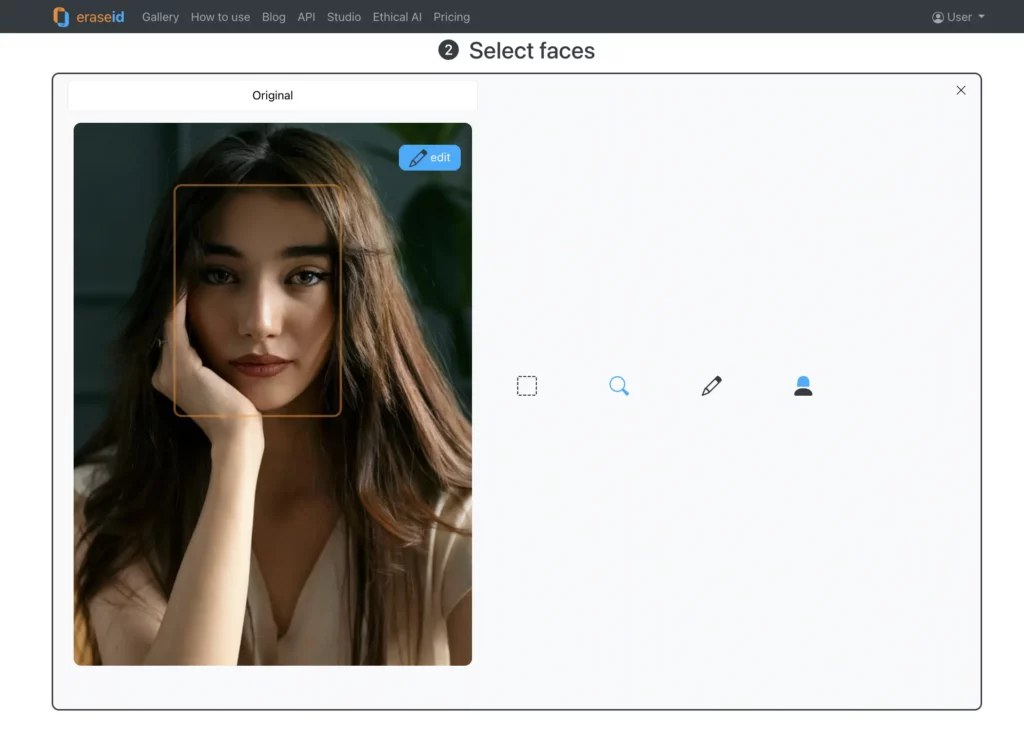
2. Upload Image:
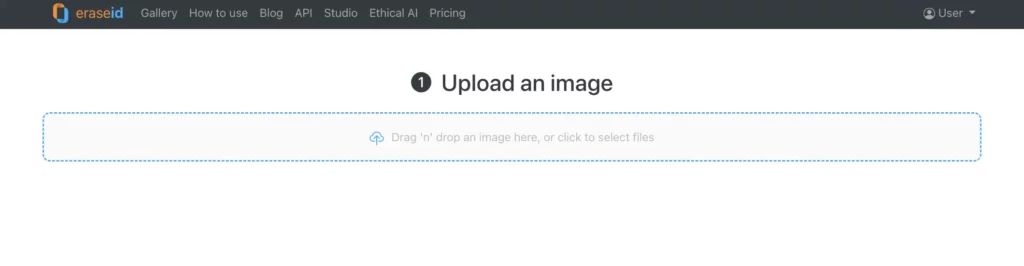
Click on the “Upload Image” button and select the photo you want to edit from your device. Ensure the image is of high quality for optimal results.
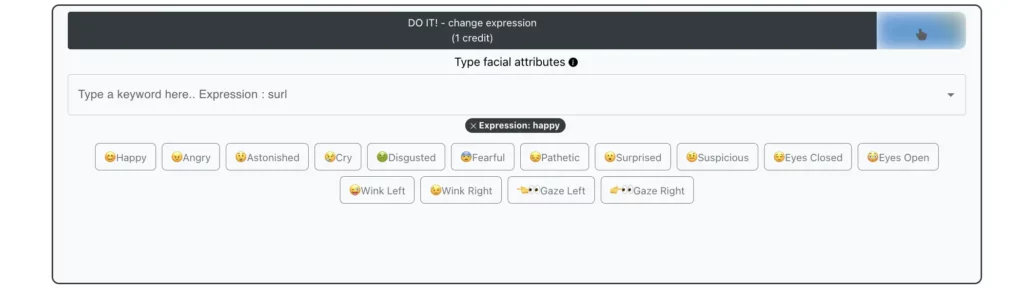
3. Choose "Change Expression":
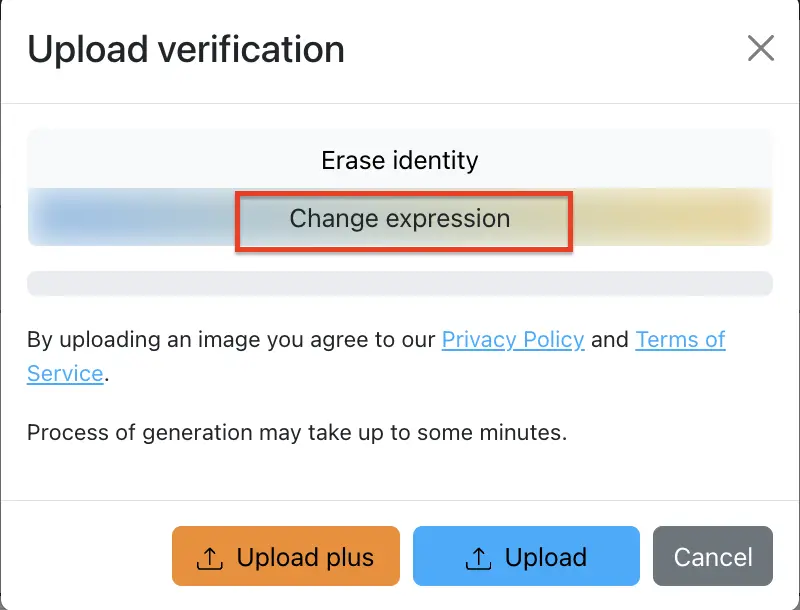
Locate the “Change Expression” feature within the EraseID interface. This feature allows you to modify various facial features, including eye direction.
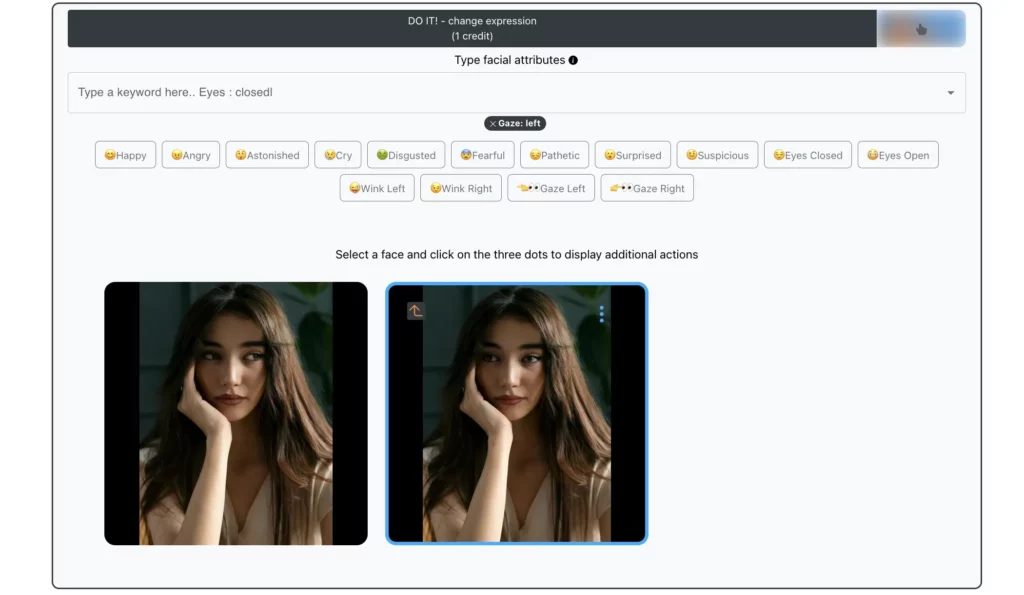
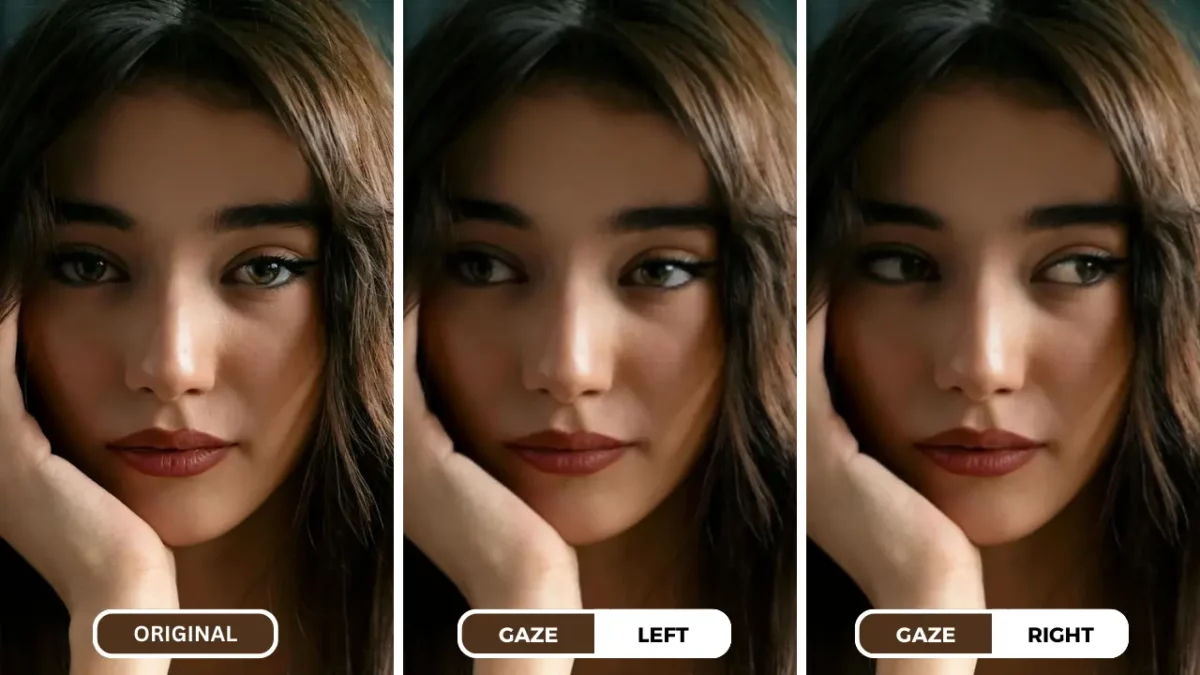
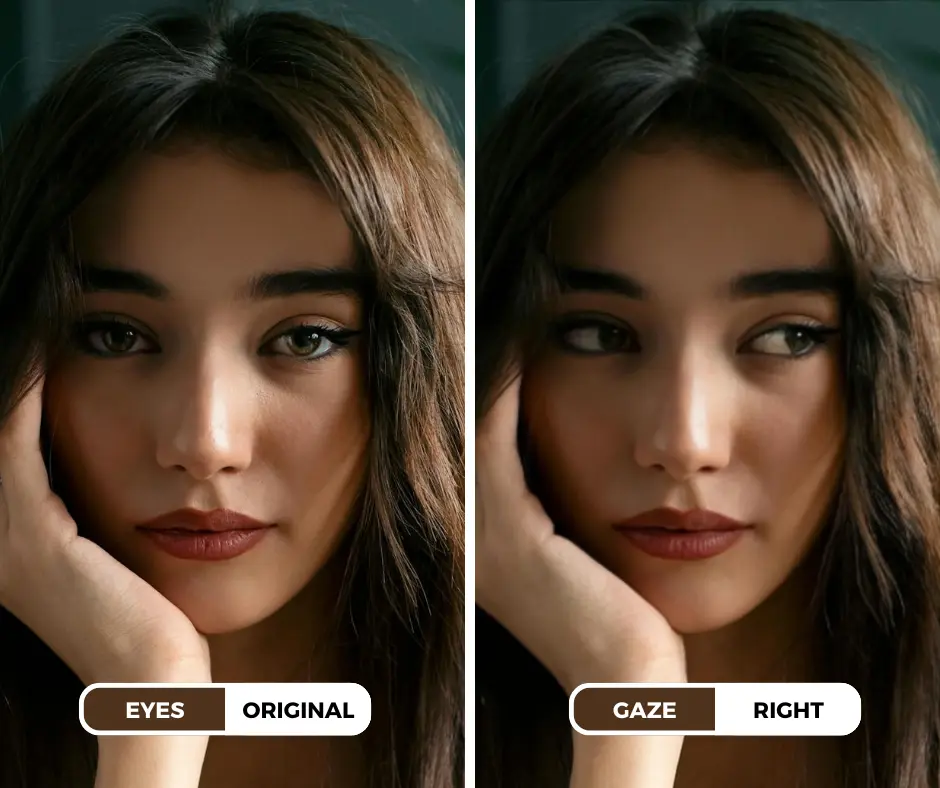
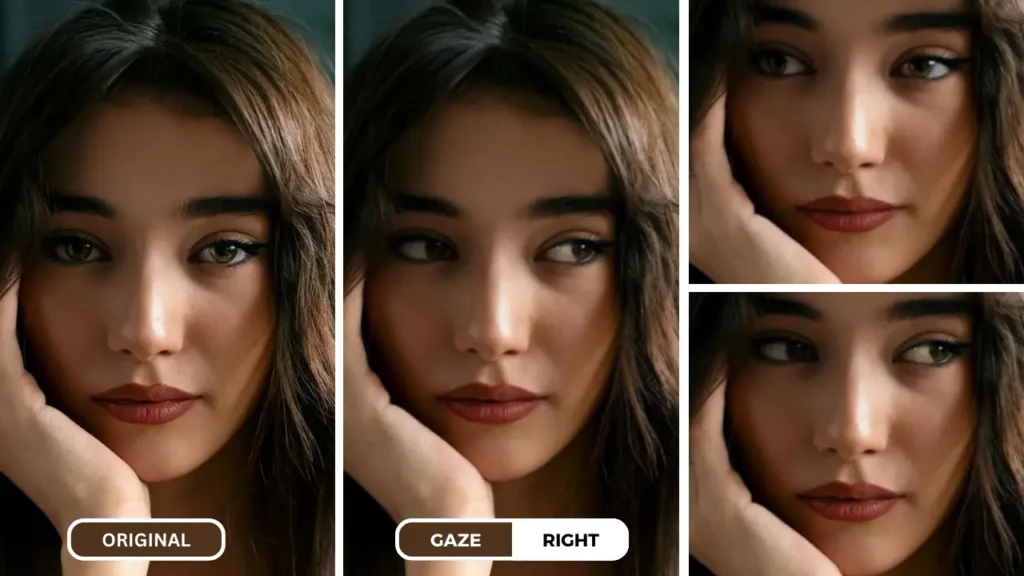
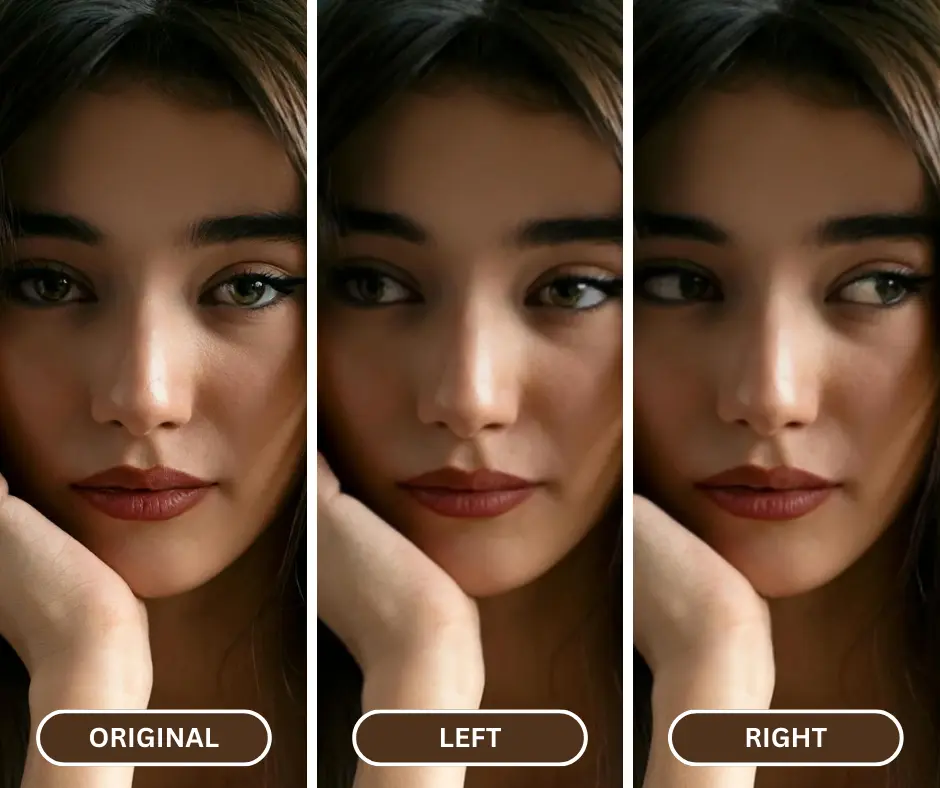
4. Adjust Eye Direction:
- Click on the “Gaze” option within the “Change Expression” feature.
- Choose between “left” or “right” to adjust the direction in which the subject’s eyes are looking. You can also use the slider to control the intensity of the eye direction change.
5. Preview and Download:
- Once you’ve made the desired adjustments, preview the edited image to ensure you’re satisfied with the results.
- If needed, make further adjustments to the eye direction or other facial features.
- When you’re happy with the edited image, click the “Download” button to save it to your device.
By following these simple steps, you can effectively use the EraseID app to change eye direction in your photos and create more engaging and visually appealing images.
Benefits of Using EraseID
Ease of Use:
- Intuitive Interface: EraseID is designed with a user-friendly interface that makes it easy to navigate and use, even for those who are new to photo editing.
- Simple Workflow: The process of uploading images, adjusting facial features, and downloading the edited results is straightforward and intuitive.
- Minimal Technical Knowledge Required: No advanced technical skills are necessary to use EraseID effectively.
AI-Powered Accuracy:
- Natural-Looking Results: EraseID’s AI algorithms are trained on a vast dataset of images, allowing them to accurately analyze facial features and apply natural-looking adjustments.
- Precision and Consistency: The AI technology ensures that the changes made to eye direction are precise and consistent, avoiding unnatural or distorted results.
- Time-Saving: AI-powered tools can automate many tasks, saving you time compared to manual editing techniques.
Time-Saving:
- Efficient Workflow: EraseID streamlines the process of editing facial features, allowing you to achieve desired results quickly and efficiently.
- Reduced Manual Effort: By automating tasks such as eye direction adjustment, EraseID reduces the need for manual manipulation and saves you time.
- Focus on Creativity: With EraseID, you can spend less time on technical aspects and focus more on the creative aspects of your photography.
In conclusion, EraseID offers a convenient and effective solution for enhancing facial features, including eye direction. Its ease of use, AI-powered accuracy, and time-saving benefits make it a valuable tool for photographers and content creators. You can take a look at the guide on how to Open Eyes in Photo App.
Additional Features to Explore
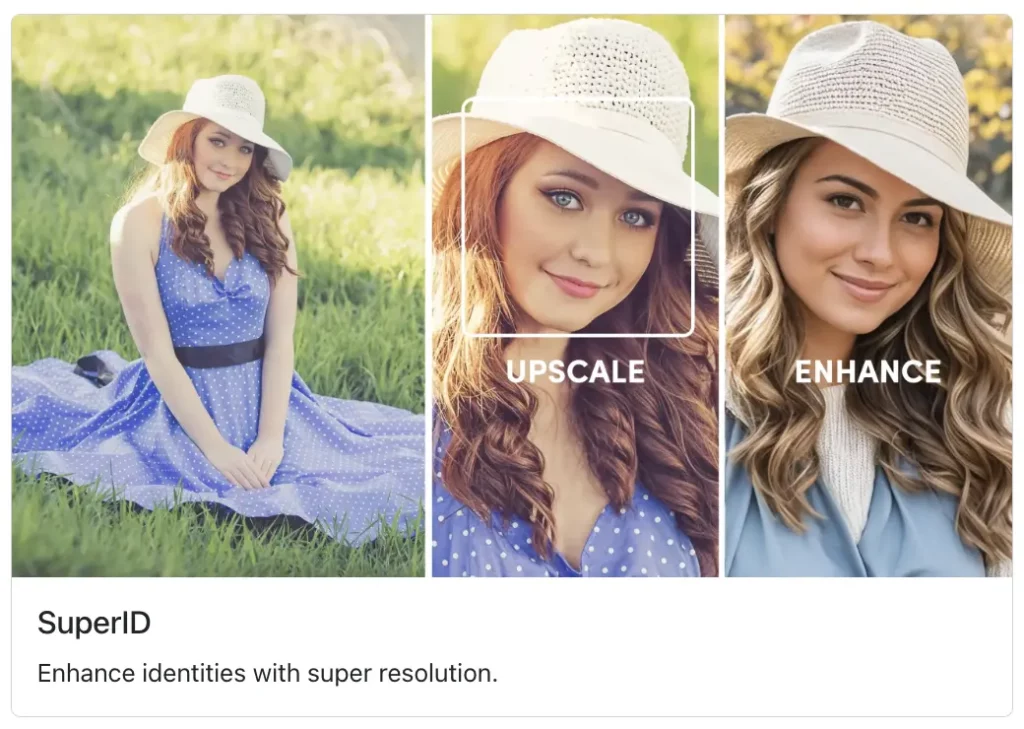
SuperID:
Beyond eye direction manipulation, EraseID offers additional features to enhance your images. One such feature is SuperID, which is designed to improve facial details and overall image quality. By applying SuperID, you can:
- Enhance Facial Features: Make your subject’s facial features appear sharper, clearer, and more defined.
- Reduce Noise: Remove unwanted graininess and noise from your images, especially those taken in low-light conditions.
- Improve Skin Tone: Enhance skin texture and even out skin tone for a more polished look.
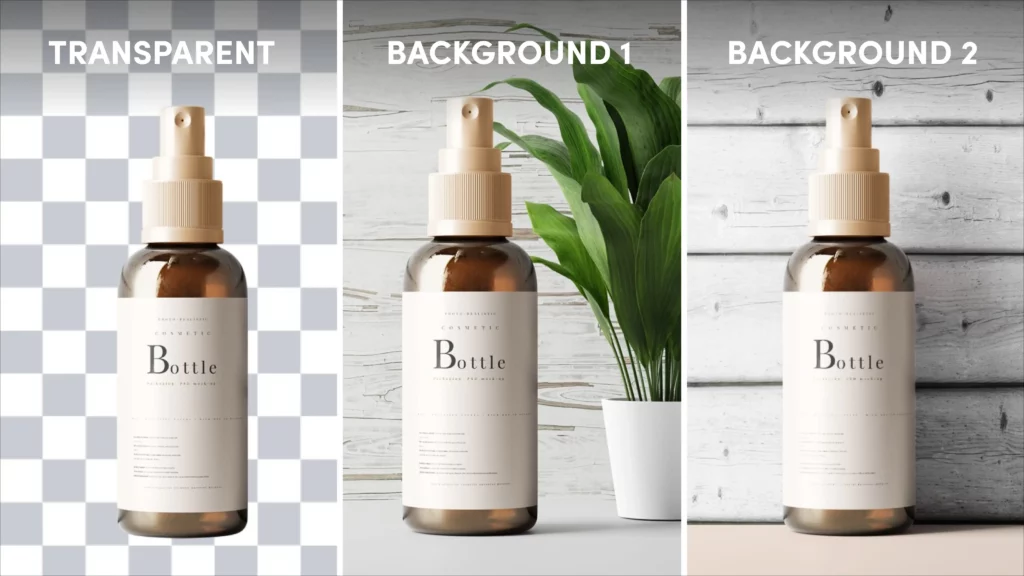
ProductID:
Another valuable feature offered by EraseID is ProductID, which allows you to change the background of your images. This can be useful for creating product photos with a consistent and professional background, or for removing unwanted elements from your images. With ProductID, you can easily replace the background with a solid color, a gradient, or even another image.
By exploring these additional features, you can further enhance your images and create visually stunning results using EraseID. Take a look at our guide on How to change Background of a picture
Changing Eye Direction in Photoshop: A Step-by-Step Guide
1. Open the Image and Create a Duplicate Layer:
- Open the image you want to edit in Photoshop.
- Duplicate the layer by going to Layer > Duplicate Layer. This will preserve the original image while allowing you to make non-destructive edits.
2. Select the Eyes:
Use the Lasso Tool or Quick Selection Tool to carefully select the eyes. If necessary, refine the selection using the Refine Edge Tool.
3. Apply the Liquify Tool:
- Go to Filter > Liquify to access the Liquify tool. This tool allows you to warp and deform parts of an image.
- Use the Forward Warp Tool to carefully adjust the position and direction of the eyes. Be gentle to avoid creating unnatural distortions.
4. Refine the Edges:
- If the Liquify tool affects areas outside the eyes, use a mask to refine the selection and blend the changes seamlessly with the rest of the image.
- Go to Layer > Mask > Reveal All to create a full mask. Then, paint with black on the mask to hide the areas you don’t want to be affected.
5. Adjust Other Features:
To maintain a natural appearance, consider adjusting other facial features, such as the head position, eyelids, or eyebrows, to complement the changed eye direction.
6. Preview and Save:
- Preview the edited image to ensure you’re satisfied with the results.
- Make any necessary adjustments before saving the final image.
Note: Manually changing eye direction in Photoshop requires skill and practice. It may be challenging for beginners or those seeking a quicker and more automated solution. In such cases, EraseID can be a valuable tool for efficiently modifying eye direction.
EraseID your App to Change Eye Direction
Ready to transform your photos with the power of AI-powered eye direction manipulation? Sign up for a free EraseID account and experience the difference firsthand.
Enjoy 10 free credits when you sign up to explore EraseID’s features and see how it can enhance your images.
Share Your Results: After using EraseID, share your before-and-after photos on social media and encourage others to try this amazing tool. Let the world see the incredible results you can achieve with EraseID. Don’t miss out on this opportunity to elevate your photography and create more captivating visuals. Sign up for EraseID today and start exploring the possibilities!