In today’s digital landscape, visual quality directly influences perception, engagement, and conversion. Whether for e-commerce product listings, social media campaigns, or high-quality prints, clarity defines credibility. Yet, most creators face the same challenge—needing to enlarge a small photo only to end up with pixelation, blur, and loss of detail. Knowing how to improve resolution of a photo is now an essential skill for designers, marketers, and photographers who want their visuals to look sharp across every medium.
PiktID’s Upscale tool offers a smarter, AI-driven way to enhance resolution without losing texture, lighting, or natural tone. Unlike manual Photoshop methods, it reconstructs missing details using trained visual intelligence, not guesswork. In this blog, you’ll explore why resolution matters, what to check before upscaling, and how to improve resolution of a photo through PiktID Studio and API. You’ll also learn best practices for quality control, troubleshooting, ethical considerations, and ROI.
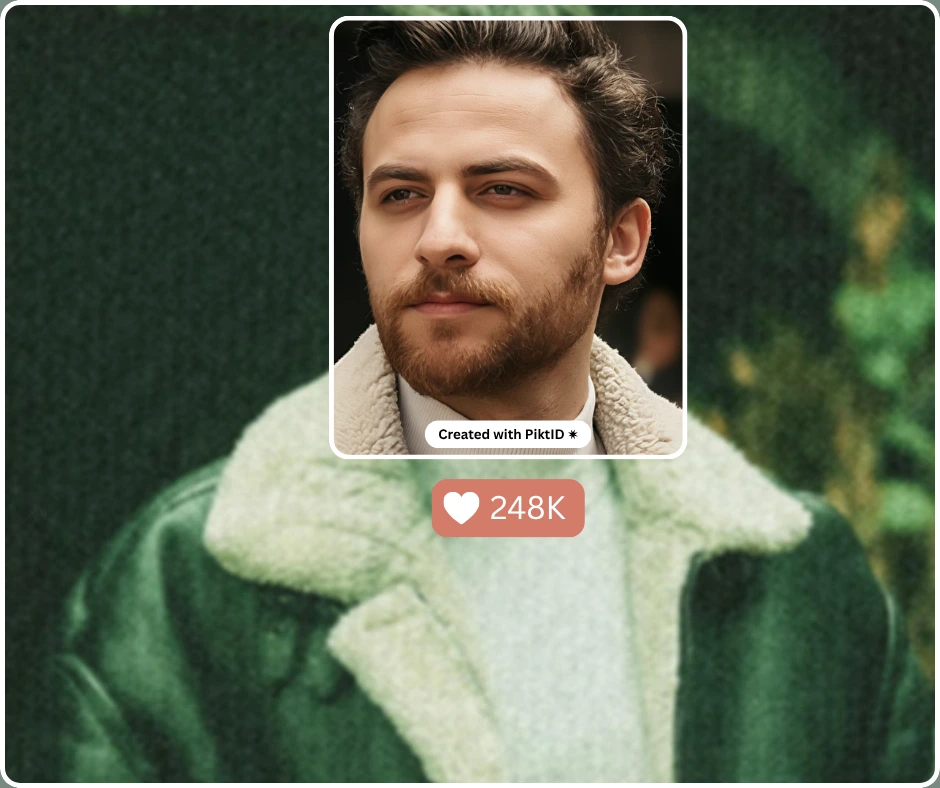
Get started instantly — try PiktID’s Upscale tool and receive 10 free credits to enhance your images with professional precision.
1. Why Resolution Matters & What “Improving Resolution” Really Means
Resolution defines the amount of visual information in an image — usually measured in pixel dimensions (width × height) or dots per inch (dpi) for print. As Adobe’s image guidelines explain, higher resolution allows more detail, while low-resolution images appear soft, grainy, or pixelated when enlarged. On screens, resolution determines clarity and color sharpness; in print, it ensures clean edges and lifelike reproduction.
When the resolution is too low, images lose impact. A product photo might appear unprofessional on an e-commerce page, reducing buyer trust. A marketing banner may look stretched on large displays. On social media, unclear visuals hurt engagement and brand recall. For businesses that depend on visuals, knowing how to improve resolution of a photo is a direct investment in perceived quality and customer confidence.
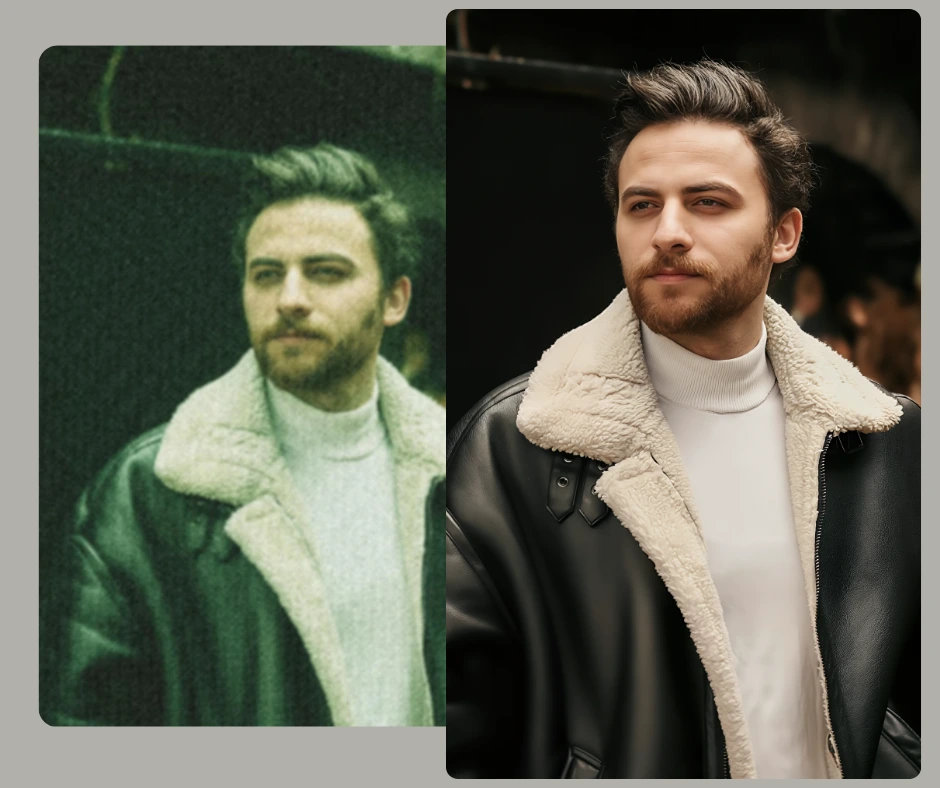
Traditional methods like bicubic interpolation could scale images but not truly enhance them. These algorithms guessed pixel data, resulting in smoother but not sharper results. AI upscaling, by contrast, uses deep learning to analyze content, detect textures, and intelligently reconstruct fine details — from hair strands to fabric weaves — that older tools could never replicate.
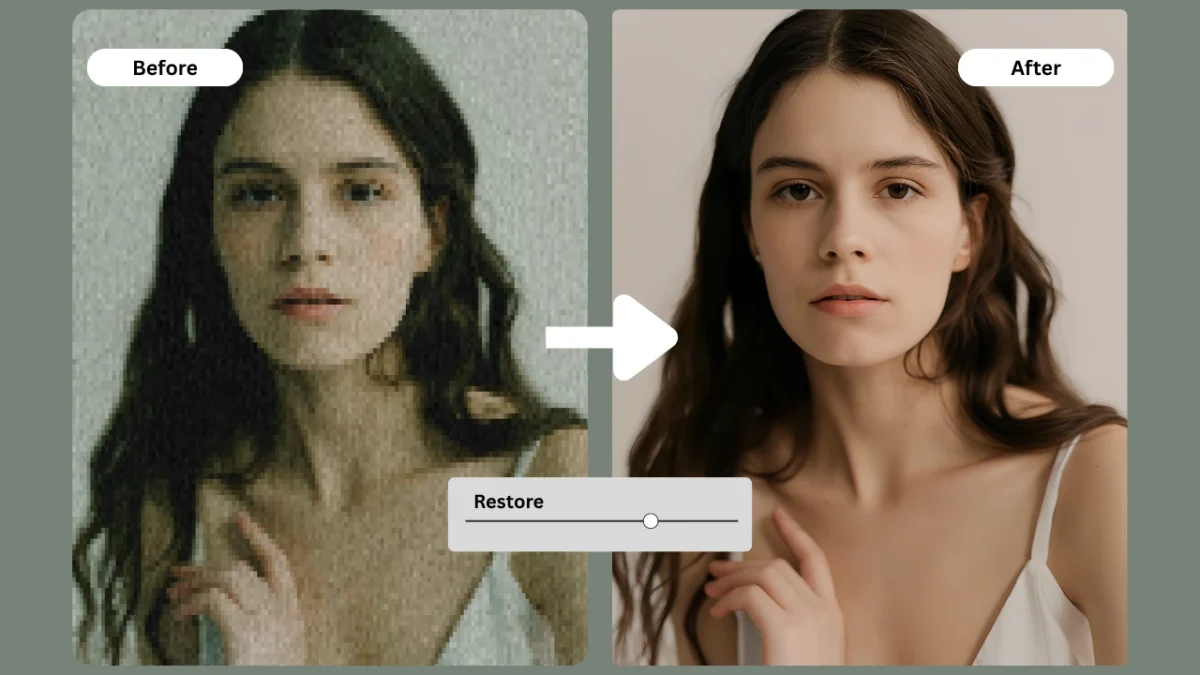
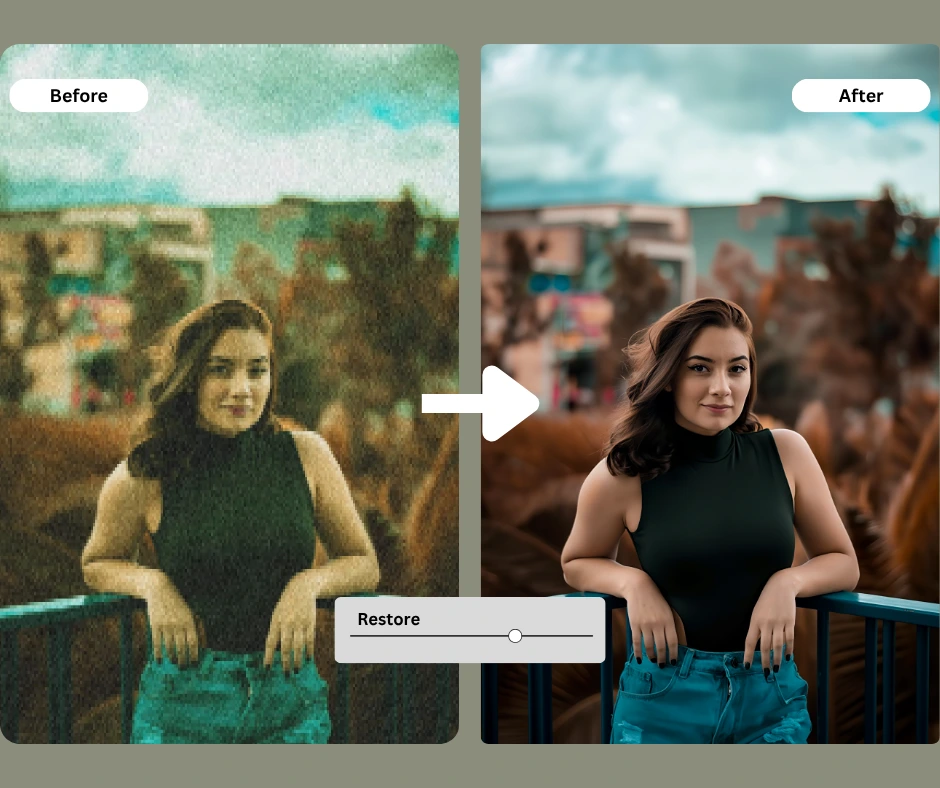
With solutions like PiktID Upscale, creators can now make image 4K or higher, enhancing resolution while preserving realism. The process is automated, fast, and requires no technical skill — making it the most efficient answer to how to improve resolution of a photo in any professional workflow.
2. Why Resolution Matters & What “Improving Resolution” Really Means

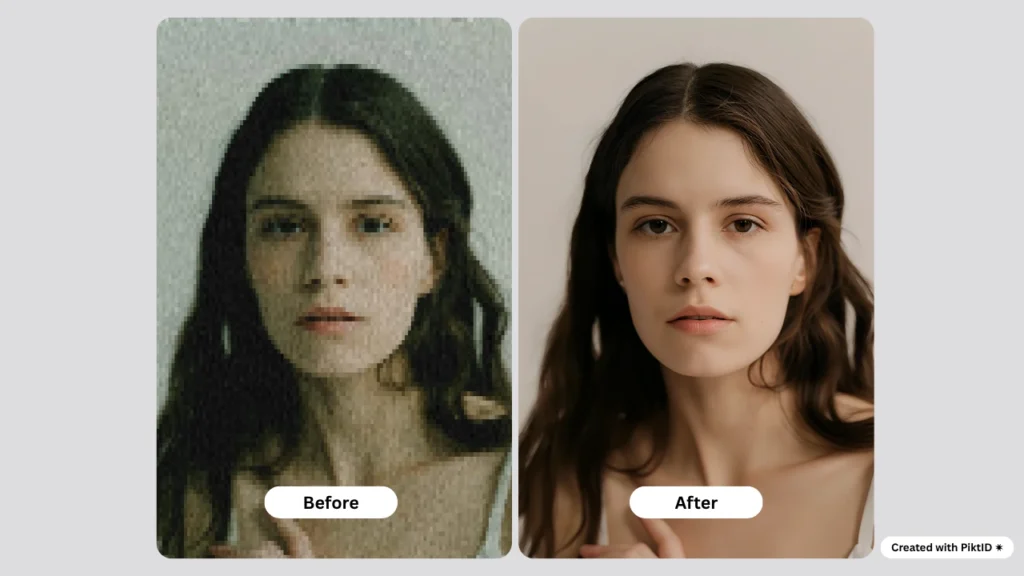
When people talk about how to improve resolution of a photo, they’re essentially referring to increasing the number of pixels and the amount of visible detail within an image. Resolution defines how much visual information an image can hold, typically measured in pixel dimensions (for example, 1920×1080) or in print terms as dots per inch (DPI). According to Adobe’s image-resolution guidelines, higher resolution directly translates to better sharpness and clarity, especially when an image is printed or enlarged for digital displays.
Low-resolution photos often suffer from pixelation, blurriness, and visible artifacts. When stretched beyond their original size, they lose detail and appear grainy — a major problem for brands and professionals who rely on high-quality visuals. On e-commerce sites, for instance, poor resolution can undermine consumer trust by making product images look unprofessional. In marketing, low-resolution images fail to scale across devices, from mobile screens to large-format displays, while in printing, they result in soft, unfocused outputs that reduce perceived quality.
For professionals exploring how to improve resolution of a photo without losing authenticity, PiktID’s Upscale tool delivers a superior solution. It uses advanced AI to reconstruct fine details, restore sharpness, and automatically balance exposure — all in a single step. Whether for print catalogs, product photos, or digital campaigns, it ensures every pixel contributes to clarity and brand impact.
3. Key Capabilities of a High-Quality Image Upscaler
When deciding how to improve resolution of a photo effectively, not all upscaling tools deliver equal results. A professional-grade image upscaler should include the following key capabilities:
- Smart upscaling options: Ability to enlarge images by 2×, 4×, or higher while maintaining texture accuracy and natural sharpness.
- Context-aware detail reconstruction: AI should understand patterns, faces, and edges to generate lifelike results.
- Accurate lighting and color consistency: Enhanced areas must blend seamlessly with original tones and exposure.
- Noise and artifact reduction: Removes compression artifacts and digital noise without over-smoothing surfaces.
- Support for multiple formats: Compatibility with JPEG, PNG, and WEBP files ensures workflow flexibility.
- User-friendly interface: A clear, minimal UI with instant previews and drag-and-drop functionality for quick results.
- Versioning and comparison tools: Allow side-by-side before-and-after viewing for quality control.
- Quality metrics and reversion control: Users should be able to measure improvements and revert to the original when necessary.
PiktID Upscale combines all these capabilities in one streamlined environment. It bridges the gap between design precision and AI automation — offering both an easy-to-use Studio for individuals and a developer-ready API for large-scale applications. For anyone serious about how to improve resolution of a photo while retaining lifelike realism, this is the modern standard for image enhancement.
4. How to Improve Resolution of a Photo with PiktID Upscale – Step-by-Step Guide (Studio & API)
Improving image resolution is both a science and an art — and with the right AI tools, it becomes a streamlined, high-quality process. Whether you’re restoring old photographs, preparing e-commerce listings, or upscaling digital assets for print, knowing how to improve resolution of a photo accurately can determine whether your visuals look professional or pixelated. PiktID’s Online photo Enhancer tool simplifies this process with AI-powered enhancement that preserves detail, texture, and lighting realism. Below is a comprehensive step-by-step guide to achieving optimal results using PiktID Studio (no-code interface) and PiktID’s API for developers.
A. Preparation – Source Image Considerations
Before using any AI upscaler, image quality starts at the source. Even the most advanced model works best when the input is clear, well-lit, and minimally compressed.
1. Choose the right image.
When learning how to improve resolution of a photo, begin by evaluating its base quality. Select images with sufficient pixel density and minimal blur. Avoid overly compressed JPEGs, screenshots, or cropped thumbnails whenever possible.
2. Pay attention to format and lighting.
AI upscaling enhances existing data; it doesn’t invent new information from nothing. Sharp edges, good lighting, and focused subjects give the model more visual cues to rebuild lost detail. RAW or high-quality PNG files are ideal if available.
3. Minimize pre-processing errors.
Avoid editing filters, noise reduction, or sharpening before uploading. Over-processing can distort edges and confuse the model. For the cleanest enhancement, let PiktID’s Upscale handle texture refinement and noise balance on its own.
4. Best practices:
- Avoid images with visible compression blocks or watermarks.
- Use images that haven’t been resized multiple times.
- For portraits, ensure the face is clearly visible and not obstructed by heavy shadows.
By preparing a strong input, you give PiktID Upscale to Face Enhance and to the best foundation to accurately improve the resolution of your photo.
B. Using PiktID Studio (No Code)

PiktID Studio is designed for users who want a quick, intuitive way to upscale images without coding. You can access it directly via PiktID Upscale.
1. Upload the image
Drag and drop your image into the Upscale workspace. Supported formats include JPEG, PNG, and WebP. The system automatically detects the file type and prepares it for processing.
2. Select your enhancement level
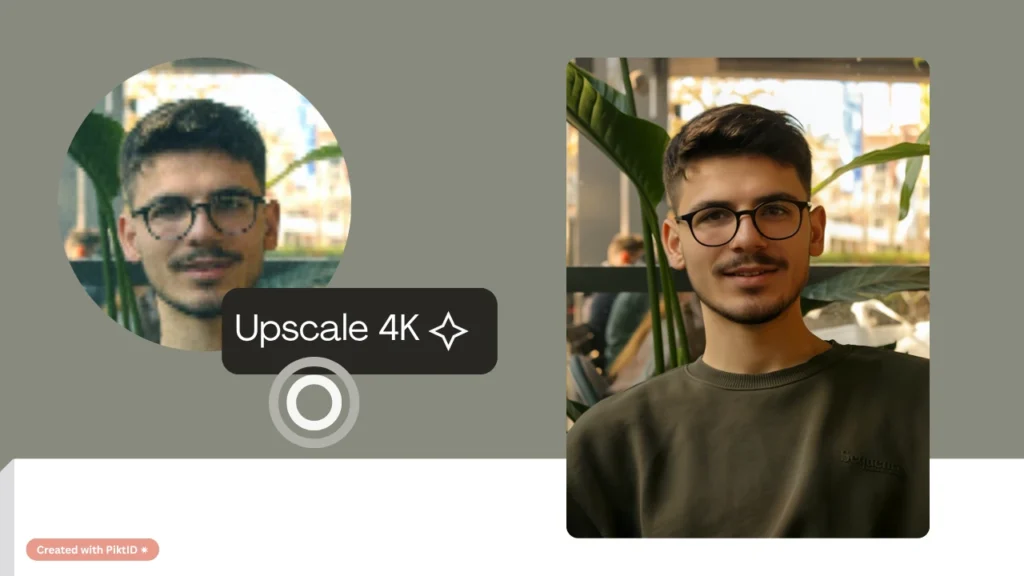
Choose your desired upscaling factor: 2×, 4×, or the “Enhance” mode which automatically optimizes based on input quality. This step is crucial in determining how much the resolution will be improved.
3. Configure advanced options.
- Creativity: Adjusts artistic texture refinement.
- Fidelity: Ensures the upscaled image remains true to its original.
- Fractality: Enhances fine detail and structure, useful for intricate surfaces like fabrics or hair.
- Denoise: Reduces digital noise and artifacts.
- Face Enhancer: (optional) Focuses AI detail improvement on faces for realistic results.
These options allow precise control over how to improve resolution of a photo based on the intended use — whether it’s product photography, portraits, or marketing visuals.
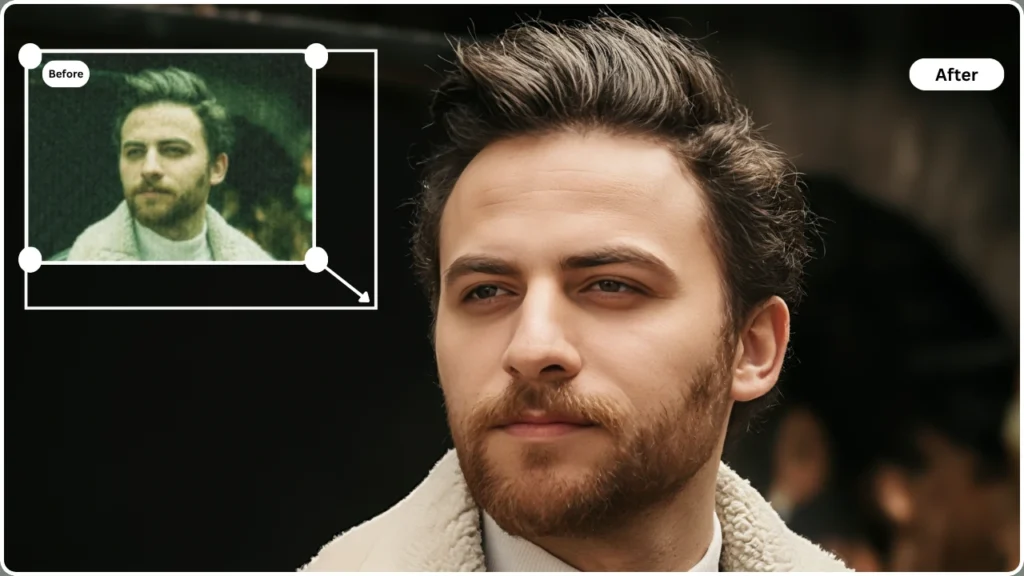
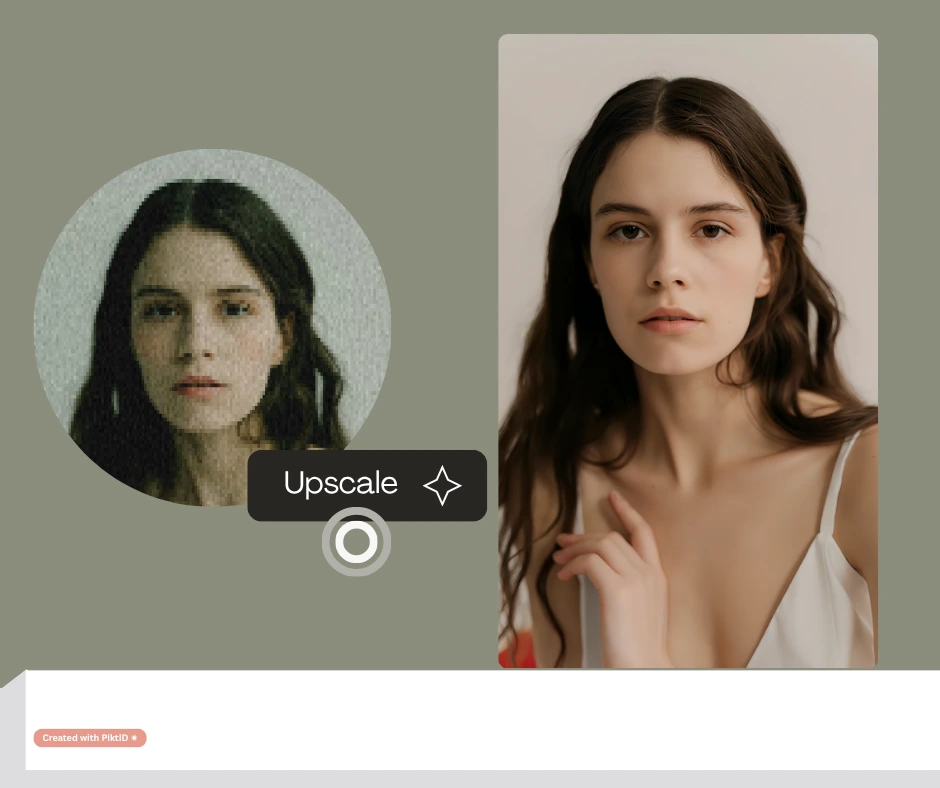
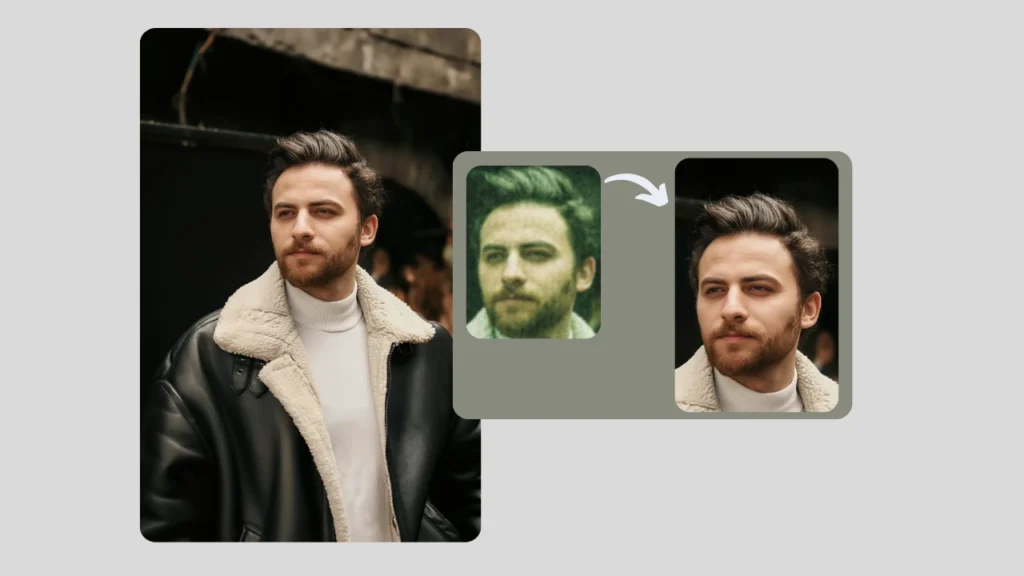
4. Preview and compare.
PiktID provides a side-by-side comparison before finalizing the upscale. The History tab allows you to toggle between original and enhanced versions, making it easy to evaluate improvements in sharpness and texture.
5. Download your output.
Once satisfied, export the image in your preferred format.
- For digital/web: Download in PNG or JPEG, optimized for faster load times.
- For print: Ensure the output meets 300 DPI and that the pixel dimensions match your print size requirement.
PiktID’s Upscale tool handles lighting, color balance, and micro-detail recovery automatically — resulting in natural, professional-quality results every time.
You can find detailed endpoint documentation on PiktID API Docs.
C. Quality Control & Export
Once the image is enhanced, proper quality control ensures your visual assets meet brand and technical standards.
1. Visual inspection.
Zoom to 100% and examine edges, hair, fine lines, and color gradients. Compare the native and upscaled versions for sharpness consistency and texture accuracy.
2. Check file size and output format.
High-resolution images naturally increase in size; ensure they remain within acceptable upload limits for your CMS or e-commerce platform.
3. Export with proper color profiles.
- Web use: Export in sRGB color space for consistent browser rendering.
- Print use: Export in Adobe RGB or CMYK (depending on print workflow) for accurate color representation.
4. Backup and organization.
Always store the original file alongside its upscaled version. This not only maintains data integrity but also makes it easier to compare or reprocess images as AI models improve.
By following these export and QC practices, you’ll not only know how to improve resolution of a photo but also how to ensure it’s ready for any professional use — from online catalogs to full-scale print campaigns.
When used correctly, PiktID Face Pixelizer turns the complex task of photo resolution enhancement into an efficient, repeatable workflow. Whether you’re a photographer, marketer, or developer, mastering how to improve resolution of a photo with this AI tool ensures your visuals always meet modern standards of clarity, detail, and realism.
Read More : How to increase pixels on a photo
5. Troubleshooting & Quality-Control Checklist

Even with advanced AI tools, it’s important to perform a final quality check when learning how to improve resolution of a photo. While PiktID’s Upscale tool automates most of the process, small inconsistencies can occur depending on the source image, lighting, and compression level. The following troubleshooting guide helps ensure your enhanced image maintains clarity, color accuracy, and web-readiness.
| Symptom | Likely Cause | Solution |
| Soft edges / blurry detail | Upscale factor too high without noise correction | Reduce the upscale factor or enable the “sharpen” or “detail enhancement” toggle in PiktID Upscale. |
| Color cast mismatch | Original image was overly compressed or color-distorted | Use the highest-quality version of the original photo, or adjust tone and lighting using PiktID’s background or color correction tools. |
| Noise amplified | Low-quality or noisy source image | Pre-clean the image using PiktID’s denoise option before applying upscale. Enable the “noise-reduction” setting during processing. |
| File too large for web | Output saved as very high-resolution PNG | Choose JPEG format with compression settings optimized for web delivery. Use progressive encoding to maintain quality with smaller file size. |
| Loss of facial texture | Over-upscaling or inconsistent lighting | Reprocess using a smaller upscale ratio, or match exposure settings to preserve natural skin texture. |
| Artifacts near edges | Mixed lighting or excessive blur in original | Apply edge refinement within the Upscale tool or retouch manually with subtle smoothing filters. |
Additional Quality Tips:

- Always retain the original image for side-by-side comparison.
- For print-ready images, ensure pixel dimensions meet physical size × DPI requirements (e.g., 300 dpi for magazines).
- When using upscaled images for commercial or portfolio work, embed watermarks or metadata tags to maintain ownership integrity.
- After you improve the resolution of a photo, test it across different screens and devices to confirm clarity and color consistency.
- If you plan to integrate the enhanced image in e-commerce or advertising, optimize dimensions for standard display ratios (1080p, 4K) to avoid stretching or cropping.
By following this checklist, you can confidently use the Best AI Upscaler by PiktID to enhance image resolution while maintaining a clean, realistic, and professional look across both digital and print formats.
6. Comparison: PiktID Upscale vs Classic Tools
When exploring how to improve resolution of a photo, it’s important to understand the performance differences between AI-powered upscalers and traditional photo enhancement tools. While conventional software like Adobe Lightroom’s Super Resolution and online upscalers such as Let’s Enhance offer useful features, their capabilities often differ in scale factor, texture fidelity, and automation support.
| Tool | Scale Factor | Texture & Detail Preservation | Print Suitability | Web Suitability |
| PiktID Upscale | Up to 8× native resolution | Excellent – AI restores texture and lighting detail | Professional-grade, suitable for large-format prints | Optimized for web; WEBP & PNG outputs |
| Adobe Lightroom Super Resolution | 2× resolution increase | Strong detail retention, but limited by RAW-only workflow | Excellent for photo professionals | Requires manual export optimization |
| Free Online Upscalers | 2–4× on average | Moderate – risk of oversharpening or artifacts | Inconsistent print quality | Suitable for casual web use only |
| Mobile Apps (Remini, Pixlr, etc.) | 2×–3× on-device | Good for selfies, not consistent for professional needs | Low to moderate | Ideal for quick social posts |
PiktID Upscale outperforms classic tools by offering a higher scale factor and more accurate preservation of lighting, texture, and skin tones—crucial for those learning how to improve resolution of a photo for professional use. Unlike Lightroom, which primarily targets photographers, PiktID’s 4K Upscaler integrates seamlessly with enterprise systems and APIs, enabling automated workflows for e-commerce, media, and design teams. Its synergy with other PiktID tools—such as face anonymization, swapping, and background editing—creates a unified imaging ecosystem that simplifies bulk content creation and brand consistency.
7. Ethics, File Formats & Output Considerations
When deciding how to improve resolution of a photo, it’s equally important to consider file formats, ethics, and output quality. Each format serves different goals:
- JPEG: Ideal for smaller file sizes and faster web loading, but uses lossy compression that may reduce sharpness.
- PNG: Preserves quality with lossless compression—best for print or professional visuals.
- WEBP: Balances compression efficiency with quality, making it excellent for responsive websites.
Color profiles also matter. Use sRGB for web content to ensure color consistency across screens, and AdobeRGB for print projects requiring deeper color tones.
From an ethical standpoint, upscaling enhances existing data but doesn’t generate new original detail. When publishing upscaled visuals, avoid implying that they represent new photographic truth—especially for journalism, archival, or forensic contexts. Transparency builds trust and maintains content integrity.
For web optimization, remember that higher-resolution outputs can increase load times. Implement CDNs, responsive image delivery, and compression settings to ensure a smooth user experience.
Finally, to make image 4K when enhancing portraits or identifiable subjects, align with PiktID’s privacy-first design: use its Anonymize or Swap tools when needed and obtain explicit consent for personal data usage. This ensures ethical compliance and responsible AI deployment throughout your imaging workflow.
8. Why choose PiktID, as your favorite Upscaler?
Learning how to improve resolution of a photo is a cornerstone of modern digital branding. Whether for e-commerce listings, marketing visuals, or professional prints, high-resolution images communicate credibility and precision. With PiktID Upscale, you can achieve superior clarity, accurate lighting restoration, and consistent textures—all within minutes, without manual editing.
Start by selecting a set of 10 key visuals from your portfolio, upscale them using PiktID Studio, and measure the difference in sharpness and engagement.
Get started with 10 free credits on PiktID Upscale — explore documentation at docs.piktid.com to integrate it into your workflow today.

Key Takeaways
- High-resolution images are crucial for professional engagement and credibility in digital marketing and e-commerce.
- PiktID’s Upscale tool enhances photo resolution using AI, avoiding the pitfalls of traditional upscaling methods like pixelation and blur.
- To improve resolution of a photo effectively, ensure high-quality source images and use PiktID Studio or API for seamless enhancement processes.
- Quality control practices post-upscaling are vital for maintaining professional standards in color, clarity, and detail.
- For best results, consider ethical implications and file format requirements when enhancing images for web or print.
Refer : Blur to Clear image Converter
9. FAQs - How to Improve Resolution of a photo
1. How to improve resolution of a photo online?
You can improve resolution of a photo online by uploading the image to an AI-powered upscaling tool such as PiktID Upscale (https://studio.piktid.com/upscale). The tool analyses the image, adds missing detail intelligently, and exports a higher-resolution version. Choose the target size, apply noise reduction/sharpening if offered, then download the result.
2. Can I make a 4K image from a regular photo?
Yes — many modern upscaling tools allow you to convert a normal photo into 4K (3840×2160) or higher resolution. In PiktID Upscale you can specify large output dimensions and the AI engine works to maintain clarity. Note: the better the starting image quality, the better the 4K conversion will appear.
3. What factors limit resolution improvement?
Several factors limit how much you can improve resolution:
(a) the original image’s quality (blur, noise, compression) matters.
(b) interpolation or up-sampling methods — naive resizing will degrade quality.
(c) Extreme scaling ratios may produce artifacts if the tool cannot generate meaningful detail. Using PiktID Upscale helps overcome many of these limitations by using AI-driven enhancement.
4. Is there a free tool to increase image resolution?
Yes — there are free or trial versions of many upscaling tools. You can try PiktID Upscale with free credits (visit Upscale) to test how the AI improves your images before committing to larger workflows.
5. Will upscaling an image reduce quality?
Upscaling can reduce quality if done with naive resizing methods (which simply duplicate pixels). But with an AI-based engine like PiktID Upscale, the algorithm predicts and synthesises missing detail, minimizing visible degradation and avoiding major quality loss when done correctly.
6. What resolution do I need for printing in large format?
For large format prints, a commonly recommended guideline is 300 dpi at final print size — so for example a 24″×36″ print at 300 dpi requires ~7200 × 10800 pixels. Larger formats may accept lower dpi (150-200) depending on viewing distance. Using PiktID Upscale you can reach high enough pixel counts to support large format printing.
7. Can I upscale batch images for my e-commerce site?
Yes — batch upscaling is a practical application. For product catalogues, you can feed multiple images into PiktID Upscale, set your target resolution and export consistent high-quality assets. This ensures each product image meets your resolution standard without manual individual effort.
8. How much does AI upscaling cost per image?
Pricing depends on the service and scale, but many platforms (including PiktID Upscale) offer tiered plans or credit-based systems. You can start with free credits, then scale to paid plans when you have higher-volume needs. Refer to the pricing page/documentation at https://docs.piktid.com for exact per-image or per-credit cost.
9. How fast can I improve the resolution of a photo with AI?
With AI tools like PiktID Upscale the turnaround for a single image is typically a few seconds to minutes depending on resolution and server load. Once you upload and choose your settings, the tool handles processing automatically, giving you a higher-resolution export quickly.
10. Is manual editing needed after AI upscaling?
Often minimal manual editing is needed — the AI handles most of the pixel generation. However, you may still want to apply final touches (such as fine grain control, sharpening edges, colour correction) especially when preparing for high-end print or detailed use-cases. PiktID Upscale interfaces allow export then further editing in your preferred editor.